How to make the best fermented salsa at home
The Easiest Homemade Fermented Salsa Recipe You’ll Ever Make
A great homemade fermented salsa recipe turns fresh tomatoes, peppers, and garlic into a tangy, probiotic-rich condiment that lasts months in the fridge — no canning required.
Here’s the quick version:
- Chop tomatoes, onion, jalapeño, garlic, and cilantro
- Mix with non-iodized sea salt (about 1 tablespoon per 1.5 lbs of vegetables)
- Pack tightly into a clean mason jar, pressing down so the brine rises above the solids
- Weigh down the vegetables to keep them submerged under the liquid
- Ferment at room temperature (68–75°F) for 2–4 days, tasting daily
- Refrigerate once it reaches your desired tanginess — it keeps for up to 4 months
Fermented salsa is essentially pico de gallo that’s been given time to come alive. The natural bacteria on your vegetables do all the work. Salt keeps the bad bacteria out while the good bacteria thrive, producing lactic acid that preserves the salsa and gives it that distinctive tangy kick.
The best part? If you’ve ever hesitated because fermentation sounds complicated, it really isn’t. You need a jar, some salt, fresh vegetables, and a few days of patience.
Fermented salsa also outlasts fresh salsa by months — making it one of the smartest ways to use up a bumper crop of summer tomatoes before they go to waste.

Understanding Lacto-Fermentation for Salsa
To master a homemade fermented salsa recipe, we first need to understand the “magic” happening inside the jar. This process is called lacto-fermentation. Despite the name, it has nothing to do with dairy or lactose. Instead, it refers to Lactobacillus bacteria.
These beneficial bacteria are naturally present on the skins of all fresh vegetables. When we place these vegetables in an environment without oxygen (submerged under brine) and add salt, the Lactobacillus go to work. They consume the natural sugars in the tomatoes and onions and convert them into lactic acid.
This lactic acid is a natural preservative. It creates an acidic environment that inhibits the growth of harmful pathogens and spoilage bacteria. It’s the same ancient science used to create sauerkraut, kimchi, and traditional dill pickles. Beyond preservation, scientific research highlights that these “good bugs” act as probiotics, which can improve digestion, boost the immune system, and even aid in reducing inflammation.
Before you dive in, we always recommend checking out Safety First: A Guide to Preserving Fermented Foods to ensure your kitchen setup is optimized for success.
Why Fermentation Beats Canning in 2026
As of April 2026, more home cooks are choosing fermentation over traditional water-bath canning. Why? Because fermentation is a “living” preservation method.
When you can salsa, the high heat required to make it shelf-stable kills the raw enzymes and vitamins. Fermentation, however, is a heat-free process. Not only does it preserve the nutrients, but it actually increases nutrient bioavailability. This means your body can absorb the vitamins in the tomatoes and peppers more easily. Plus, you get that wonderful, faint effervescence—a tiny “fizz” on the tongue—that cooked salsa simply can’t replicate.
Essential Ingredients for a Homemade Fermented Salsa Recipe
The quality of your ingredients directly impacts the flavor of your ferment. Since we aren’t cooking this, every flavor is magnified.
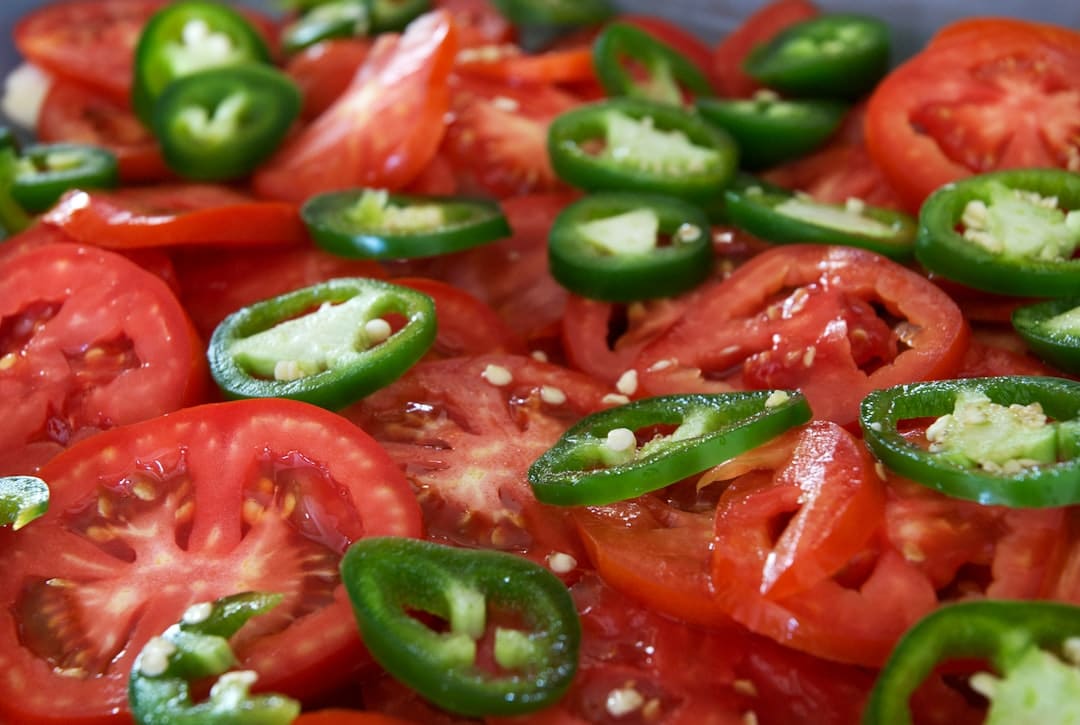
- Roma Tomatoes: These are our top choice for a homemade fermented salsa recipe. They have a meatier texture and lower water content, which prevents the salsa from becoming too “soupy.”
- Onions: White, yellow, or red onions all work. Red onions will turn the brine a lovely pink hue.
- Garlic: Use fresh cloves. For a deeper flavor profile, you might even want to try using fermented garlic.
- Peppers: Jalapeños are the standard, but serranos or habaneros work for those who like it hot.
- Cilantro: Essential for that classic salsa taste.
- Salt: This is the most critical ingredient.
The Role of Salt and Starters
In fermentation, salt is not just for seasoning; it’s a safety barrier. It draws moisture out of the vegetables to create a natural brine and prevents bad bacteria from taking over before the lactic acid levels rise.
What salt is best? Always use non-iodized salt. We recommend Redmond’s Real Salt, Himalayan pink salt, or high-quality sea salt. Avoid standard table salt, as the iodine and anti-caking agents can inhibit the growth of beneficial bacteria and turn your salsa a muddy color.
Do you need a starter? You might see recipes calling for whey (the liquid strained from yogurt) or brine from a previous batch of pickled vegetables. While these can “jumpstart” the process, they aren’t strictly necessary. The vegetables already have all the bacteria they need. However, if you’re fermenting in a very cool kitchen, a tablespoon of whey can help ensure things get moving quickly.
Lastly, ensure you use chlorine-free water if you need to top off your brine. Chlorine is designed to kill bacteria—exactly what we’re trying to grow!
Customizing Your Homemade Fermented Salsa Recipe
One of the joys of making this at home is the ability to tweak the flavors to your family’s preference.
- Heat Levels: For a mild salsa, remove the seeds and membranes from your jalapeños. For extra kick, leave them in or swap for a hotter pepper.
- Citrus: While lime juice is traditional, lemon juice provides a different kind of brightness. Some even add a splash after fermentation is complete to keep the flavor sharp.
- Fruit: Want a tropical twist? Add small chunks of mango or pineapple. The extra sugar in fruit will speed up the fermentation, so keep a close eye on it!
- Onion Varieties: Green onions (scallions) offer a milder, fresher bite than large bulb onions.
Step-by-Step Guide: How to Make the Best Fermented Salsa at Home
Ready to get your hands dirty? Making a homemade fermented salsa recipe is a tactile, rewarding experience.

Step-by-Step Instructions for Your Homemade Fermented Salsa Recipe
- Prep the Veggies: Coarsely dice about 2.5 pounds of Roma tomatoes. If you prefer a smoother texture, you can pulse them in a food processor, but be careful not to turn them into juice.
- The Aromatics: Finely dice one large onion, 3-5 cloves of garlic, and your choice of peppers. Chop about half a cup of fresh cilantro.
- The Salt Mix: In a large bowl, combine all the vegetables. Add 1 tablespoon of high-quality sea salt. Toss everything thoroughly. Let it sit for about 10–15 minutes. You’ll notice the salt starts drawing out the juices—this is your “gold,” the natural brine.
- Packing the Jar: Use a canning funnel to transfer the mixture into clean glass jars. As you add layers, use a muddler or a heavy spoon to pack the vegetables down firmly.
- Submersion: This is the “golden rule” of fermentation: Keep it under the brine. The liquid should rise above the level of the vegetables.
- Headspace: Leave at least 1 to 2 inches of “headspace” at the top of the jar. Fermentation produces CO2 bubbles, and the mixture will expand. If the jar is too full, it will overflow.
If you enjoy the process of making spicy ferments, you might want to try Mastering the Art of Lacto-Fermented Hot Sauce next!
Equipment and Tools for Success
While you don’t need a laboratory, a few specific tools make the process foolproof:
- Mason Jars: Wide-mouth jars are easiest for packing and cleaning.
- Fermentation Weights: These glass discs sit on top of the vegetables to keep them submerged.
- Airlock Lids: These allow carbon dioxide to escape without letting oxygen (and mold spores) in. If you don’t have these, you’ll need to “burp” your jars by loosening the lid once or twice a day.
- Muddler: Useful for packing the salsa down to release air bubbles.
Troubleshooting and Success Signs
It’s normal to feel a little nervous during your first ferment. You’re essentially letting food “sit out,” which goes against everything we’re taught about food safety! But remember, the salt and acid are your protectors.
Managing Submersion and Spoilage
What is Kahm Yeast? If you see a thin, white, wavy film on the surface of your brine, don’t panic. This is likely Kahm yeast. It’s harmless, though it can affect the flavor if left too long. You can simply scrape it off. It usually happens if the environment is too warm or the brine isn’t acidic enough yet.
Identifying Mold Mold is different. It is usually fuzzy and can be green, black, or white. If you see fuzzy mold growing on your salsa, discard the entire batch. Do not try to scrape it off, as mold roots can extend deep into the jar.
The “Seat-Belt” Technique If you don’t have glass weights, you can use a “seat-belt.” Take a large slice of bell pepper or a clean cabbage leaf and wedge it under the “shoulders” of the mason jar. This creates a physical barrier that keeps the smaller bits of salsa from floating to the surface.
Success Signs:
- Bubbles: You should see tiny bubbles rising to the top after 24–48 hours.
- Aroma: It should smell tangy and “pickly,” like a good deli. If it smells putrid or like rotting garbage, something went wrong—toss it.
- Color: The vegetables might look slightly more muted or “cooked” than when they were fresh.
For more tips on identifying successful ferments, check out our guide on Quick and Easy Pickled Vegetables for Every Meal.
Storage, Shelf Life, and Serving Suggestions
Once your salsa has fermented for 2 to 5 days and reached that perfect “zing,” it’s time to move it to cold storage.
The cold temperature of a refrigerator (ideally in the upper 30s or low 40s°F) significantly slows down the fermentation process. While the flavor will continue to develop and mellow over time, the salsa will stay crisp and delicious for months.
How long does it last? Properly prepared and stored homemade fermented salsa recipe batches can last anywhere from 4 to 18 months. Most experts agree that 3–4 months is the “sweet spot” for peak flavor, but as long as it smells good and shows no signs of mold, it is generally safe to eat.
Explore more Fermented Recipes to keep your fridge stocked year-round!
Best Ways to Serve Fermented Salsa
Don’t just limit yourself to chips! This salsa is a versatile powerhouse in the kitchen:
- Taco Tuesday: The acidity of the salsa perfectly cuts through the richness of carnitas or fatty beef.
- Morning Boost: Stir a spoonful into scrambled eggs or top an avocado toast.
- Grilled Meats: Use it as a zesty relish for grilled chicken or steak.
- The Brine: Don’t throw away the juice! The leftover brine is a probiotic “shot.” You can add it to Bloody Marys, use it as a starter for your next ferment, or even use it to marinate chicken.
Frequently Asked Questions about Homemade Fermented Salsa Recipe
How long does fermented salsa last in the fridge?
When kept in a sealed jar in the back of the fridge, it typically lasts 3 to 4 months. Some homesteaders report it staying good for up to a year, but the texture may become softer over time. Always use your senses—smell and sight—before consuming.
Can I make this recipe without a starter like whey?
Absolutely! This is called “wild fermentation.” The vegetables already carry all the Lactobacillus needed. As long as you use the correct amount of non-iodized salt and keep the vegetables submerged, it will ferment perfectly on its own.
Why is my fermented salsa fizzy?
Fizz is a sign of success! It means the bacteria are active and producing carbon dioxide. This effervescence is one of the hallmarks of a “living” salsa and is highly prized by fermentation enthusiasts.
Conclusion
At Recipes Guard, we believe that fermentation is more than just a way to save a harvest—it’s a way to reconnect with our food and support our health. This homemade fermented salsa recipe is the perfect entry point for beginners. It’s fast, forgiving, and incredibly delicious.
Whether you’re looking to preserve a bumper crop of garden tomatoes or simply want to add more probiotics to your diet, we hope this guide empowers you to get fermenting. Don’t forget to explore our Preserving Basics for more tips on keeping your pantry full.
Ready to start your next project? More info about fermentation services and recipes are just a click away. Happy fermenting!