Lacto Fermentation Preserving Basics for Beginners
The Ancient Art of Keeping Food Alive: Lacto Fermentation Preserving Basics
Lacto fermentation preserving basics come down to one simple idea: use salt, vegetables, and naturally occurring bacteria to transform fresh produce into tangy, shelf-stable food — no heat, no vinegar, no special equipment required.
Here is a quick overview of how it works:
- Salt the vegetables — use 2–4% salt by weight to create the right environment
- Submerge under brine — keep everything below the liquid to block oxygen
- Let bacteria do the work — Lactobacillus converts sugars into lactic acid
- Watch for bubbles — CO2 activity means fermentation is happening
- Taste and smell test — a sour, pleasant smell signals progress
- Refrigerate when ready — once pH drops below 4.6, move to cold storage
Humans have been preserving food this way for thousands of years — long before refrigerators, canning jars, or grocery stores existed. Nearly every culture on earth developed its own version: sauerkraut in Germany, kimchi in Korea, fermented chiles in China. The process was not invented in a lab. It was discovered by paying attention to what happened when salt met vegetables.
What makes lacto-fermentation so compelling today is not just nostalgia. It is the combination of simplicity, safety, nutrition, and flavor that no other preservation method quite matches. A head of cabbage left on the counter rots within weeks. Packed with salt in a jar, that same cabbage becomes sauerkraut that can last for months — or even years.
Whether you want to reduce food waste, eat more probiotic-rich foods, or just make better pickles, this guide covers everything you need to get started with confidence.

What is Lacto-Fermentation and How Does It Work?
At its core, lacto-fermentation is a biological process where “good” bacteria—specifically from the Lactobacillus genus—convert sugars and starches in food into lactic acid. Despite the “lacto” in the name, this has nothing to do with dairy; it refers to the lactic acid produced during the process.
These bacteria are already present on the surface of all fresh fruits and vegetables. When we place these vegetables in an anaerobic environment (one without oxygen) and add salt, we create a specialized “club” where only the beneficial bacteria are allowed in. The salt performs a clever trick called osmotic shock: it pulls water out of the vegetable cells and inhibits the growth of spoilage-causing microbes that can’t handle the salinity.
As the Lactobacillus bacteria feast on the vegetable sugars, they “poop out” lactic acid and carbon dioxide (this is why you see bubbles!). This lactic acid gradually lowers the pH levels of the environment. Once the pH drops below 4.6, the environment becomes too acidic for harmful pathogens to survive. According to Safety First A Guide To Preserving Fermented Foods, this acidity is nature’s ultimate preservative. This isn’t just folk wisdom; Scientific research on the antimicrobial properties of lactic acid confirms that these organic acids are highly effective at inhibiting foodborne pathogens.
Benefits Over Canning and Freezing
While we love a good freezer-stocked pantry, lacto fermentation preserving basics offer several advantages that modern methods simply can’t touch:
- Nutrient Density: Unlike canning, which uses high heat that can destroy heat-sensitive vitamins (like Vitamin C), fermentation actually increases the nutritional value of food. It creates new B vitamins and makes minerals more bioavailable.
- Enzyme Production: Fermentation produces active enzymes that aid in human digestion. If you’ve ever felt better after a forkful of “real” sauerkraut, that’s why.
- Zero Energy Use: Once the jar is packed, the bacteria do all the work at room temperature. No boiling water baths for hours and no electricity required for the preservation phase.
- Flavor Complexity: Canning produces a static flavor profile. Fermented foods are “living,” developing deep, funky, and complex esters over time—much like a fine barrel-aged balsamic or wine.
To dive deeper into the various ways we keep food fresh, check out our Category/Preserving Basics for more traditional techniques.
Essential Equipment and Salt for Lacto Fermentation Preserving Basics
One of the best things about starting your journey into lacto fermentation preserving basics is that you likely already have most of the gear in your kitchen. You don’t need a laboratory; you just need a few clean vessels and a way to keep things submerged.
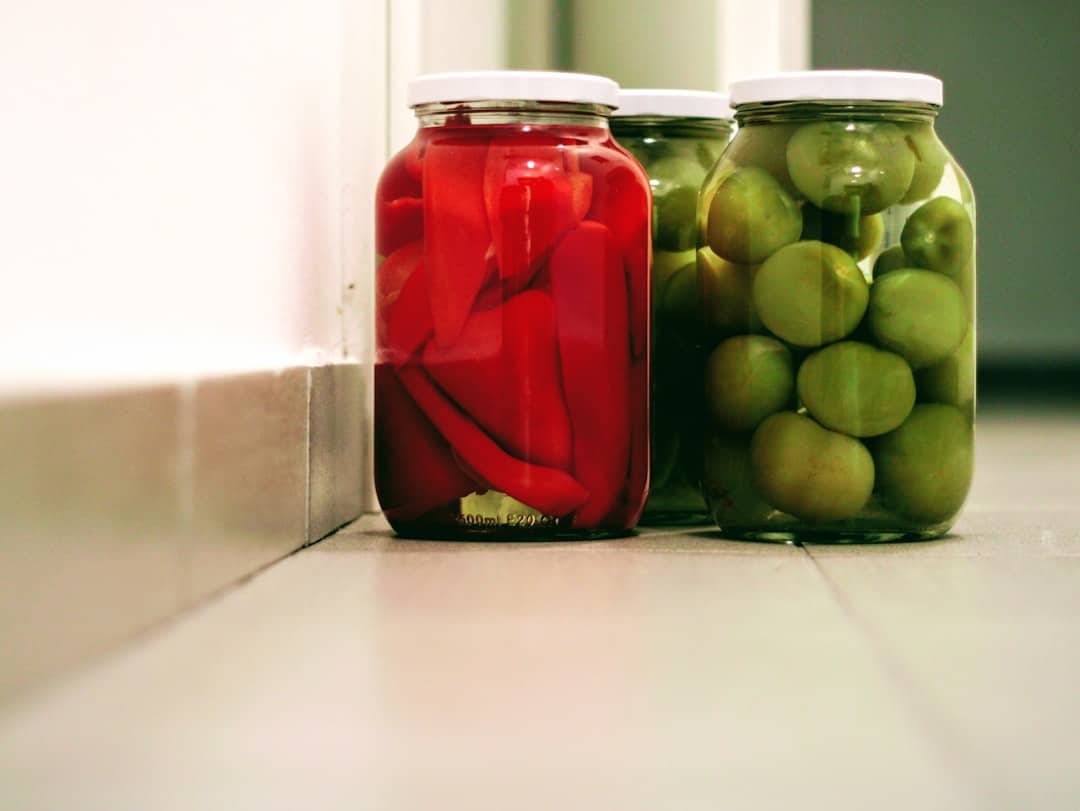
- Glass Jars: Wide-mouth Mason jars are the gold standard for beginners. They are easy to clean and let you see exactly what’s happening inside.
- Ceramic Crocks: For larger batches (like 5 gallons of sauerkraut), traditional stone crocks are wonderful because they maintain a very stable temperature and keep light out.
- Kitchen Scale: While “tablespoon” measurements work for some, we highly recommend using a scale. Weighing your vegetables and salt in grams ensures a perfect 2-3% salinity every time.
- Glass Weights: These sit on top of the vegetables to keep them below the brine. If you don’t have these, a smaller glass jar filled with water or even a clean stone can work in a pinch.

The Salt Table: What to Use
Not all salts are created equal in fermentation. You want “pure” salt without additives.
| Salt Type | Recommended? | Why? |
|---|---|---|
| Sea Salt | Yes | Unrefined, contains trace minerals, no additives. |
| Kosher Salt | Yes | Pure and easy to dissolve, but check for anti-caking agents. |
| Pickling Salt | Yes | Fine grain, dissolves quickly, very pure. |
| Himalayan Pink | Yes | High mineral content; may slightly change the color of the brine. |
| Table Salt | No | Contains iodine and anti-caking agents that can darken produce or inhibit bacteria. |
Recommended Salt Ratios for Lacto Fermentation Preserving Basics
Getting the salt right is the difference between a crisp, tangy pickle and a jar of mushy compost. For most vegetable ferments, a 2% to 4% concentration by weight is the “sweet spot.”
A 2.5% ratio is generally perfect for produce like cabbage or carrots. However, for “wetter” or softer vegetables like peppers or cucumbers, you might go up to 3.5% or 5% to prevent them from becoming too soft. This salt level creates the necessary microbial selection, allowing the “good guys” to win the battle for the jar. For a great starting point on salt-based preservation, see our guide on Quick And Easy Pickled Vegetables For Every Meal.
Mastering the Methods: Dry Salting vs. Wet Brining
There are two primary ways to apply lacto fermentation preserving basics to your vegetables, depending on how much water the vegetable naturally holds.
Dry Salting is used for vegetables that you shred or chop finely, like cabbage for sauerkraut. You weigh the cabbage, add the calculated salt, and then massage it with your hands. This physical tamping and kneading causes moisture extraction—the salt draws the juice right out of the vegetable. Eventually, you’ll have enough natural liquid to submerge the cabbage completely. When packing the jar, leave about 1 to 2 inches of headspace to allow for the inevitable bubbling and expansion. This method is the secret behind Mastering The Art Of Lacto Fermented Hot Sauce.
Wet Brining is for whole or large-cut vegetables like carrot sticks, green beans, or cauliflower. Since these won’t release enough juice to cover themselves, we create a “pour-over” brine by dissolving salt into water.
Creating the Perfect Brine
When making a wet brine, the quality of your water matters as much as your salt.
- Use Filtered Water: Tap water often contains chlorine or chloramines, which are designed to kill bacteria. Since we are growing bacteria, this is counterproductive! If you must use tap water, let it sit out in an open container for 24 hours to allow the chlorine to evaporate.
- The 3.5% Solution: A standard, reliable brine is made by mixing about 35 grams of salt per liter of water (roughly 2 tablespoons per quart).
- The Pour-Over: Pack your jars tightly with vegetables, then pour the brine over them until they are covered by at least an inch of liquid.
Looking for a “set it and forget it” wet brine project? Dont Be Afraid Of The Funk With This Easy Fermented Garlic Recipe is a fantastic beginner choice.
The Fermentation Environment: Time, Temperature, and Readiness
Once your jar is packed and weighted, the environment becomes the master. The ideal temperature range for most produce is 68-72°F (20-22°C). If it’s much colder (below 60°F), the bacteria go into a “slow-motion” mode, and fermentation can take weeks. If it’s too hot (above 78°F), the process happens too fast, which can lead to mushy textures or off-flavors.
During the first few days, you’ll notice CO2 production. This is a great sign! You’ll see tiny bubbles rising to the top, and the brine might become slightly cloudy. This is part of the microbial succession, where different strains of bacteria take turns lowering the pH. To learn more about how specific bacteria like Lactobacillus plantarum handle these environments, you can explore Scientific research on temperature effects on Lactobacillus.
Identifying Readiness in Lacto Fermentation Preserving Basics
How do you know when it’s time to stop? Fermentation is as much an art as it is a science.
- The Sniff Test: It should have a clean, tangy, and slightly “sour” aroma. If it smells like a dumpster or rotting gym socks, something went wrong.
- The Taste Test: Start tasting after day 4. Is it sour enough for you? Does it still have a nice crunch?
- Visual Cues: The color of the vegetables will often dull (bright green beans turn olive), and the brine will stay cloudy.
- pH Check: If you want to be 100% sure, use a pH strip. A reading of 4.6 or lower means the ferment is safe and ready for the fridge.
For more inspiration on what a finished ferment should look like, browse through our Category/Fermented Recipes.
Troubleshooting and Safety in Lacto Fermentation Preserving Basics
It’s normal for beginners to feel a little nervous about leaving food on the counter. “Is it supposed to look like that?” is the most common question we get!
Kahm Yeast vs. Mold: This is the big one. Kahm yeast is a flat, white, wavy film that can form on the surface. It is harmless (though it can affect flavor if left too long). You can simply scrape it off. Mold, on the other hand, is usually fuzzy and can be colorful (black, green, pink, or red). If you see fuzzy, colorful mold, or if the mold is growing directly on the food rather than the surface of the brine, it’s best to toss the batch and start over.
Other Common Issues:
- Cloudy Brine: This is perfectly normal! It’s a sign that the bacteria are active.
- Sliminess: This usually happens if the temperature was too high or not enough salt was used. It’s often safe but unappealing to eat.
- Pink Sauerkraut: This is usually caused by a yeast called Rhodotorula, often due to uneven salting.
Preventing Botulism and Spoilage
One of the biggest myths is that fermentation is dangerous. In reality, lacto-fermentation is incredibly safe because C. botulinum (the bacteria that causes botulism) cannot thrive in an acidic environment. By ensuring your pH drops below 4.6, you are effectively creating a “botulism-proof” zone.
The keys to safety are:
- Surface Submersion: “Under the brine, all is fine.” If it’s exposed to air, it can grow mold.
- Anaerobic Seal: Use an airlock or “burp” your jars daily to let CO2 out without letting oxygen in.
- Cleanliness: You don’t need to be sterile, but use clean jars and wash your hands.
For a comprehensive safety checklist, revisit our Safety First A Guide To Preserving Fermented Foods article.
Long-Term Storage and Beginner Recipes
Once your ferment has reached the perfect tang, it’s time to move it to long-term storage. Refrigeration doesn’t “kill” the ferment; it just puts the bacteria into a deep sleep.
Most fermented vegetables will stay delicious in the fridge for 9 to 12 months. In a very cool cellar (below 50°F), they can last even longer. In fact, some people find that the flavor of sauerkraut or kimchi doesn’t truly peak until it has aged in the fridge for a few months!
Ready to try your first batch? Here are three beginner-friendly ideas:
- Traditional Sauerkraut: Just cabbage and 2.5% salt. It’s the easiest way to learn “dry salting.”
- Ginger Carrots: Sliced carrots in a 2.5% brine with a few slices of fresh ginger. Kids love these because they stay very crunchy.
- Dill Pickles: Small cucumbers in a 3.5% brine with garlic and fresh dill. Add a grape leaf or oak leaf to the jar—the tannins help keep the pickles crisp!
Find the full step-by-step instructions for these and more in our Category/Fermented Recipes section.
Frequently Asked Questions about Fermentation
Can I use tap water for my brine?
It’s not recommended because the chlorine in tap water can inhibit the growth of the beneficial Lactobacillus bacteria. If you must use it, boil it and let it cool, or let it sit out overnight so the chlorine can dissipate.
Is the white film on top of my jar dangerous?
Usually, no. If it’s flat, white, and not “fuzzy,” it’s likely Kahm yeast, which is harmless. If it’s fuzzy or colorful, that’s mold, and you should discard the batch.
How long will my fermented vegetables last in the fridge?
When kept submerged in their brine, most ferments last at least 9 months. Some, like sauerkraut, can remain edible for up to 2 years, though they may become softer over time.
Conclusion
Mastering lacto fermentation preserving basics is about more than just filling your pantry; it’s about reclaiming a piece of human history. At Recipes Guard, we believe that fermentation is the ultimate “slow food” that fits perfectly into a modern, sustainable lifestyle. By working with nature instead of trying to heat-treat it into submission, you get food that is more nutritious, more flavorful, and safer than many store-bought alternatives.
Don’t be afraid of the “funk”—it’s just the sound of billions of tiny probiotics making your food better. Grab a jar, some salt, and a head of cabbage, and start your journey today.
Start your fermentation journey with our full recipe collection