Fruit Preservation 101: From Freezing to Drying
Why Learning How to Preserve Fruits at Home Can Save You Money and Reduce Waste
Knowing how to preserve fruits at home can be the difference between enjoying summer strawberries in January and watching a beautiful basket of peaches turn to mush on your counter.
The main methods for preserving fruit at home are:
- Freezing – Best for most fruits; maintains quality for 8-12 months at 0°F
- Canning – Water bath method for high-acid fruits; shelf life up to 1 year when sealed
- Making jams and jellies – Sealed jars last about a year; unsealed should be eaten within a few weeks
- Dehydrating/drying – Removes moisture to prevent spoilage; shelf-stable for several months
- Short-term refrigerator storage – Vinegar-washed fruit in airtight containers can last up to 21 days
Each method has different equipment needs, time requirements, and results. Some are simple enough for a beginner on a Sunday afternoon. Others take more practice.
Fresh fruit is wonderful – but it doesn’t wait for you. High water and sugar content means most fruits start breaking down fast once they’re harvested. Without some form of preservation, even a modest haul from the farmers market can turn into food waste within days.
The good news? You don’t need a fancy kitchen or expensive tools to get started. Whether you want to flash-freeze blueberries, make a simple strawberry jam, or dry apple rings in your oven, there’s a method that fits your time, budget, and skill level.
This guide walks you through every major preservation technique – from freezing to fermenting – so you can make the most of seasonal fruit all year long.

Essential Preparation and Safety for How to Preserve Fruits at Home
Before we dive into the heavy lifting of canning or dehydrating, we need to talk about the foundation of all preservation: preparation and safety. You can’t turn “past-its-prime” fruit into a gourmet preserve. Quality in equals quality out. We always recommend selecting fruit at its peak ripeness—firm, vibrant, and free from heavy bruising or mold.
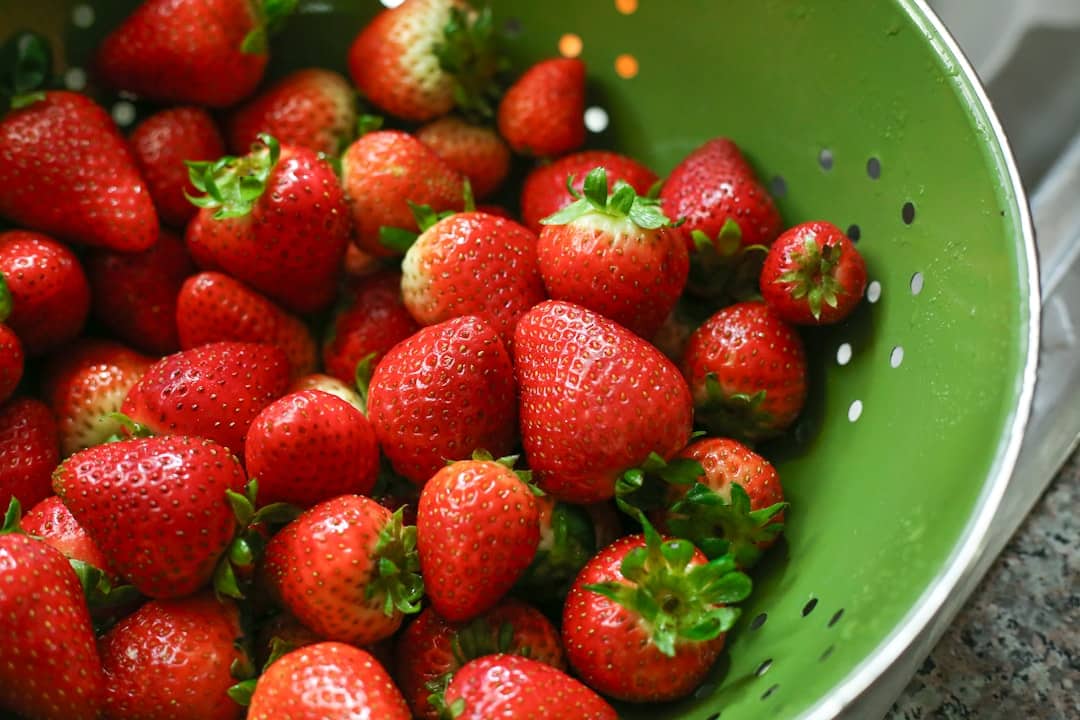
When you bring your haul home, the first step is a proper wash. While many people just use plain water, a vinegar soak is a game-changer for longevity. By mixing one part white vinegar (ensure it has 5% acidity) with three to four parts water, you can effectively kill off mold spores that cause rapid decay. This is especially vital for porous fruits like berries. After a 5-minute soak, rinse them well and—this is the most important part—let them air-dry completely on a clean towel. Moisture is the enemy of preservation!
Safety is our top priority at Recipes Guard. When you move into more advanced methods like canning or fermenting, you must follow tested recipes to prevent risks like botulism. For more on keeping your kitchen safe, check out Safety First: A Guide to Preserving Fermented Foods. Always sanitize your equipment, including jars and lids, by boiling them or using a high-heat dishwasher cycle before you begin.

Managing Ethylene Gas and Moisture
Have you ever noticed that one brown banana can ruin a whole bowl of fruit? That’s thanks to ethylene gas, a natural ripening agent. “Ethylene super-producers” like apples, bananas, tomatoes, and onions should be kept away from ethylene-sensitive produce like broccoli or squash. If you’re storing fresh fruit in the fridge, keep these producers in a separate drawer.
Moisture control is the other half of the battle. For berries, we’ve found that storing them in airtight glass containers after they’ve been washed and dried can keep them fresh for up to 21 days! Compare that to unwashed berries in original plastic vented containers, which often mold in less than a week. If you notice condensation in your jars, tuck a paper towel inside to absorb the dampness. For more tips on keeping your pantry items crisp, see our guide on How to Save Your Salty Snacks.
Preventing Browning and Discoloration
Nothing ruins the appeal of a home-preserved peach like it turning a muddy brown. This is called enzymatic browning, and it happens the moment oxygen hits the cut surface of certain fruits. To prevent this, we use antioxidants.
The most effective method is an ascorbic acid (Vitamin C) wash. You can buy powdered ascorbic acid or crush six 500-milligram Vitamin C tablets into a gallon of water. Alternatively, a simple mix of one part lemon juice to four parts water works well for shorter periods. For firmer fruits like apples or pears, a brief “blanching” or steam treatment for two minutes can also stop the enzymes in their tracks before they head to the freezer or dehydrator.
Freezing Techniques: Syrup, Sugar, and Dry Packs
Freezing is arguably the easiest way to learn how to preserve fruits at home. It requires the least amount of specialized equipment and does a fantastic job of retaining nutrients and fresh flavor. Most fruits will maintain high quality for 8 to 12 months if kept at a steady 0°F.
The key to successful freezing is using moisture-vapor resistant containers. This prevents the dreaded “freezer burn.” Whether you use thick freezer bags or wide-mouth glass Mason jars, always leave “headspace”—about 1/2 to 1 inch of empty space at the top—because fruit expands as it freezes. For more technical details on the science of cold storage, you can refer to this resource on Freezing Fruit new.
Step-by-Step Freezing: How to Preserve Fruits at Home
There are three main ways to pack your fruit for the freezer:
- Syrup Pack: Best for fruits intended for desserts or eating raw. We recommend a 40% syrup ratio (about 2 3/4 cups sugar to 4 cups water). This helps the fruit retain its shape and color.
- Sugar Pack: Sprinkle sugar directly over sliced fruit (like peaches or strawberries) and let it sit until a juice forms. This is perfect for fruit you plan to use in pies or cobblers later.
- Unsweetened Dry Pack (Flash Freezing): This is our favorite for berries. Spread washed and dried berries in a single layer on a baking sheet and freeze until hard. Then, transfer them to a bag. This prevents them from clumping into one giant fruit-brick!
For those looking to avoid added sugar, you can use unsweetened fruit juice or a pectin syrup to maintain texture. You can find more safety tips on this method at How to freeze fruit safely. Citrus juices and fruits have a shorter freezer life, usually around 4 to 6 months, before the quality begins to dip.
Home Canning and Making Fruit Jams
Canning is the “gold standard” for long-term storage. When done correctly, canned fruits are shelf-stable for a full year. Because most fruits are naturally high in acid, they can be safely processed using the boiling water bath method. This involves submerging filled jars in boiling water to kill microorganisms and create a vacuum seal.
You must use tempered glass Mason jars; re-using old spaghetti sauce jars is a big no-no as they aren’t designed to withstand the heat and may break. If you’re new to jars and seals, our Preserving Basics category is a great place to start.
One critical factor many beginners miss is altitude adjustment. Water boils at a lower temperature the higher up you are, so if you live in the mountains, you’ll need to increase your processing time. Once your jars have cooled for 24 hours, test the seal by pressing the center of the lid. If it doesn’t “pop” back, you’ve got a successful vacuum seal!
Jams, Jellies, and Low-Sugar Spreads
Who doesn’t love a bright, sweet jam on toast? Making preserves is a wonderful way to use up bruised but flavorful fruit. Most recipes rely on pectin, a natural fiber found in fruit, to get that signature “gel” set.
If you’re watching your sugar intake, you can use “no-sugar-needed” pectin. You can even use artificial sweeteners like Splenda, though we recommend adding them after cooking for the best flavor, as sucralose doesn’t provide the same preservative texture as sugar. For more quick-start ideas, check out Quick and Easy Pickled Vegetables for Every Meal, which applies similar principles of acidity and preservation. Once a jar is opened, it must live in the fridge. Low-sugar or no-sugar spreads should be eaten within 5 to 7 days, as they lack the preservative power of a full-sugar jam.
Dehydrating and Fermenting Fruits for Long-Term Storage
Dehydrating is one of the oldest and most space-efficient ways to preserve fruit. By removing moisture (usually down to about 10-20%), you create an environment where mold and bacteria simply cannot grow.
You can use a dedicated food dehydrator or even your kitchen oven if it can stay at a low temperature (around 140°F to 200°F). The goal is “leathery” or “pliable,” not “crunchy” like a chip. To test for doneness, let a piece cool; when you squeeze it, no moisture should bead on the surface. For specific recipes and drying times, the National Center for Home Food Preservation offers excellent, science-backed charts. Fruit leathers—pureed fruit dried into thin sheets—are a fantastic, healthy snack for kids!
The Role of Fermentation in Fruit Preservation
While we often think of pickles and sauerkraut, fermentation is a brilliant way to preserve fruit too. Unlike canning, which uses heat to kill bacteria, fermentation uses salt and natural sugars to encourage “good” bacteria (probiotics) to create organic acids.
Fruit kvass or honey-fermented berries are traditional techniques that alter the fruit’s texture and flavor, giving it a complex, tangy zing. This method doesn’t just preserve; it actually enhances the nutritional profile of the fruit. It’s a specialized focus of ours here at Recipes Guard, where we love exploring how these “living” foods can benefit our health.
Maximizing Shelf Life and Avoiding Common Mistakes
To get the most out of your hard work, you need to store your preserves correctly. Sealed canned goods and dried fruits should be kept in a cool, dark, and dry place—ideally between 50°F and 70°F. Always label your jars with the fruit type and the date.
Common Preservation Pitfalls to Avoid
Even experts make mistakes! Here are the most common ones we see:
- Reusing Lids: You can reuse the screw bands, but you must always use new flat lids for canning to ensure a proper seal.
- Incorrect Headspace: Too much air or too little room for expansion can lead to seal failure or jar breakage.
- Using Iron or Galvanized Tools: These can react with the acid in fruit, causing off-flavors and unappetizing colors. Stick to stainless steel or wood.
- Ignoring Altitude: If you don’t adjust your boiling time for your elevation, you might not kill all the bacteria, leading to spoilage.
For a deeper dive into these fundamentals, revisit our Preserving Basics section.
Frequently Asked Questions about How to Preserve Fruits at Home
How does ethylene gas affect fruit storage?
Ethylene is a ripening hormone. “Super-producers” like apples and bananas can cause nearby sensitive produce to ripen and rot prematurely. Always separate your storage: keep your apples away from your leafy greens and your onions away from your potatoes to maximize shelf life.
Can I use artificial sweeteners for fruit preservation?
Yes, but with caveats. While Splenda (sucralose) can provide sweetness in canning and freezing, it doesn’t offer the same “plumping” effect or color preservation as sugar. For jams, you must use a specific “low-methoxyl” pectin designed for low-sugar recipes.
How long can I store homemade jam?
A properly sealed jar of jam is best used within one year. Once you break that seal, it should be kept in the refrigerator and consumed within 3 to 4 weeks. If you’ve made a no-sugar-added version, it’s much more perishable—try to use it within 5 days.
Conclusion
Learning how to preserve fruits at home is an empowering skill. It connects you to the seasons, reduces your environmental footprint by cutting food waste, and ensures your pantry is always stocked with high-quality, delicious food. Whether you start small by freezing a few bags of summer berries or go all-in with a water bath canner for autumn pears, every step toward self-sufficiency is a win.
At Recipes Guard, we are passionate about helping you master these traditional techniques with a modern, safe approach. From the tang of a ferment to the sweetness of a home-canned peach, the flavors of the harvest are yours to keep. For more inspiration and technical guides, dive into our More info about preserving basics and start your preservation journey today!