Mastering Homemade Bread and Butter Pickles Is a Sweet Success
The Sweet, Tangy World of Homemade Bread and Butter Pickles
A great bread and butter pickle recipe is one of the most rewarding things you can make at home — sweet, tangy, crunchy, and ready to elevate any burger or sandwich.
Here’s the quick version of how to make bread and butter pickles:
- Slice pickling cucumbers and onions thin
- Salt and soak in ice water for 1–3 hours to draw out moisture
- Simmer a brine of white vinegar, apple cider vinegar, sugar, mustard seeds, celery seeds, and turmeric
- Pack vegetables into clean jars and pour hot brine over them
- Cool, then refrigerate for at least 24 hours before eating
- Store in the fridge for up to one month
Unlike sharp dill pickles, bread and butter pickles get their signature flavor from sugar and warm spices. The result is a crisp, balanced bite — sweet and sour at the same time.
These pickles also happen to be one of the easiest preservation projects you can start. No special equipment is required for the refrigerator version. And if you want jars that last a full year on the shelf, the traditional canning method isn’t much harder.
The name itself has roots in lean times. During the Great Depression, cucumbers were plentiful while meat and cheese were scarce. Simple bread-and-butter sandwiches with homemade pickles became an everyday staple — and the name stuck.
Whether you’re a seasoned home preserver or just getting started, this guide walks you through everything: ingredients, technique, crispness tips, and storage.

Important bread and butter pickle recipe terms:
- easy pickled vegetables
- pickling recipes
What Defines a Bread and Butter Pickle?
When we talk about pickles, most people immediately think of the sharp, garlicky snap of a kosher dill. However, the bread and butter variety occupies a completely different flavor profile. While dill pickles are savory and acidic, a bread and butter pickle recipe focuses on a harmonious balance of sweet and tart.

The defining characteristic of these pickles is the sugar content. They are significantly sweeter than dills, but that sweetness is tempered by a complex blend of spices. Historically, these emerged as a popular staple during the Great Depression. Because cucumbers were cheap and easy to grow, they were pickled in a sweet brine and served between buttered slices of bread to make a “meatless” sandwich that still felt substantial and flavorful.
To achieve that classic “Granny’s kitchen” flavor, several key spices are non-negotiable:
- Mustard Seeds: These provide a tiny pop of texture and a mild, earthy heat.
- Celery Seeds: Essential for that old-fashioned savory undertone.
- Turmeric: This isn’t just for flavor; it gives the pickles their trademark golden hue. Without it, your pickles might look a bit dull.
- Whole Cloves: Often used in traditional recipes to add a warm, aromatic depth that balances the vinegar.
For those looking for a deep dive into the culinary mechanics of this balance, this Bread and Butter Pickle Recipe offers excellent insights into achieving that perfect sweet-to-sour ratio.
Preparing Your Ingredients for a Classic Bread and Butter Pickle Recipe
The secret to a world-class pickle isn’t just the brine; it’s the quality of the produce you start with. As we move through April 2026, we’ve seen a massive resurgence in home gardening, and there is truly no substitute for a cucumber picked fresh from the vine.
When selecting your ingredients, keep these standards in mind:
- The Cucumbers: Look for Kirby or “pickling” cucumbers. They are shorter, bumpier, and have much thinner skins than their salad-bound cousins.
- The Vinegar: You need a vinegar with at least 5% acidity for safety and flavor. Most recipes use a combination of white distilled vinegar (for a clean sharp bite) and apple cider vinegar (for fruitiness and depth).
- The Sugar: A mix of granulated white sugar and light brown sugar is our favorite approach. The white sugar provides pure sweetness, while the brown sugar adds a hint of molasses-like richness.
- The Salt: This is where many beginners stumble. Always reach for pickling or canning salt.
If you are new to food preservation, we recommend checking out our guide on Preserving Basics to get familiar with the fundamental science of acidity and safety.
Why Avoid Regular Grocery Store Cucumbers?
It might be tempting to grab those long, smooth English cucumbers or standard “slicing” cucumbers from the produce aisle, but we strongly advise against it for this bread and butter pickle recipe.
Standard grocery store cucumbers are often coated in a food-grade wax to extend their shelf life. This wax prevents the pickling brine from penetrating the vegetable, leaving you with a flavorless center. Furthermore, these varieties are bred for high water content and have large, watery seed pockets. When they hit the hot brine, they tend to turn mushy almost instantly. Kirby cucumbers, by contrast, have a dense cell structure that stays crisp even after heating.
Pickling Salt vs. Table Salt
Does the type of salt really matter? In pickling, yes! Standard table salt often contains iodine and anti-caking agents. While these are fine for seasoning a steak, they are disastrous for pickles. Iodine can cause your pickles to turn an unappetizing dark color, and anti-caking agents will settle at the bottom of your jar, creating a cloudy, murky brine that looks like it has spoiled.
Pickling salt is pure sodium chloride. It dissolves quickly and keeps your brine crystal clear. If you can’t find it, kosher salt is a safe second choice, though you may need to adjust the volume since kosher salt crystals are larger. For more tips on vegetable preparation, see our article on Quick and Easy Pickled Vegetables for Every Meal.
The Science of the Soak: Achieving Maximum Crispness
If there is one step you should never skip, it is the salt and ice soak. This is the “make or break” moment for the texture of your pickles.
When we slice cucumbers and toss them with pickling salt and ice, a process called osmosis begins. The salt draws excess moisture out of the cucumber cells. By removing this “internal water” before the cucumbers ever touch the vinegar, we ensure that the finished pickle is dense and crunchy rather than soft and waterlogged.
We recommend a soak of at least one to three hours. During this time, the cucumbers will actually become slightly flexible and “leathery.” Don’t worry — they will crisp right back up once they hit the cold jars and hot brine. After the soak, make sure to rinse the vegetables thoroughly under cold water. You want the flavor of the salt, but you don’t want the pickles to be a salt bomb.
Why Recipes Include an Ice or Salt Soak
Beyond just drawing out water, the ice serves a structural purpose. Keeping the cucumbers at a near-freezing temperature during the salting process helps maintain “turgor pressure” within the vegetable cells. This firming effect is what gives you that audible snap when you bite into a finished pickle chip.
This technique isn’t just for cucumbers; it works wonders for the onions and bell peppers often included in a bread and butter pickle recipe. For those interested in how salt affects vegetable structure in other ways, our section on Fermented Recipes explores the deeper biological changes that occur during longer preservation cycles.
Mastering the Bread and Butter Pickle Recipe: Refrigerator vs. Canning
There are two primary ways to finish your pickles: the refrigerator method and the water bath canning method. The choice depends entirely on how much space you have in your fridge and how long you want them to last.
| Feature | Refrigerator Pickles | Water Bath Canned Pickles |
|---|---|---|
| Effort Level | Low – Great for beginners | Medium – Requires some equipment |
| Texture | Ultra-crisp and fresh | Slightly softer but still crunchy |
| Shelf Life | ~1 month (must stay chilled) | ~1 year (shelf stable) |
| Equipment | Standard jars and a pot | Canner, rack, and jar lifter |
The refrigerator method is perfect for a quick summer batch. However, if you find yourself with ten pounds of cucumbers from a garden harvest, canning is the way to go. For a fantastic “no-canning” starting point, we love this Homemade Bread and Butter Pickles (No Canning) guide.
Step-by-Step Refrigerator Method
- Preparation: Slice 2.5 to 3 pounds of pickling cucumbers into 1/8-inch discs. Thinly slice one large yellow onion and one red bell pepper (optional).
- The Soak: Toss the vegetables with 1/4 cup pickling salt and cover with a generous layer of ice. Let sit for 3 hours. Rinse and drain twice.
- The Brine: In a non-reactive saucepan, combine 1.5 cups white vinegar, 1 cup apple cider vinegar, 2 cups sugar, 1 tablespoon mustard seeds, 1 teaspoon celery seeds, and 1/2 teaspoon turmeric. Bring to a simmer until the sugar is completely dissolved.
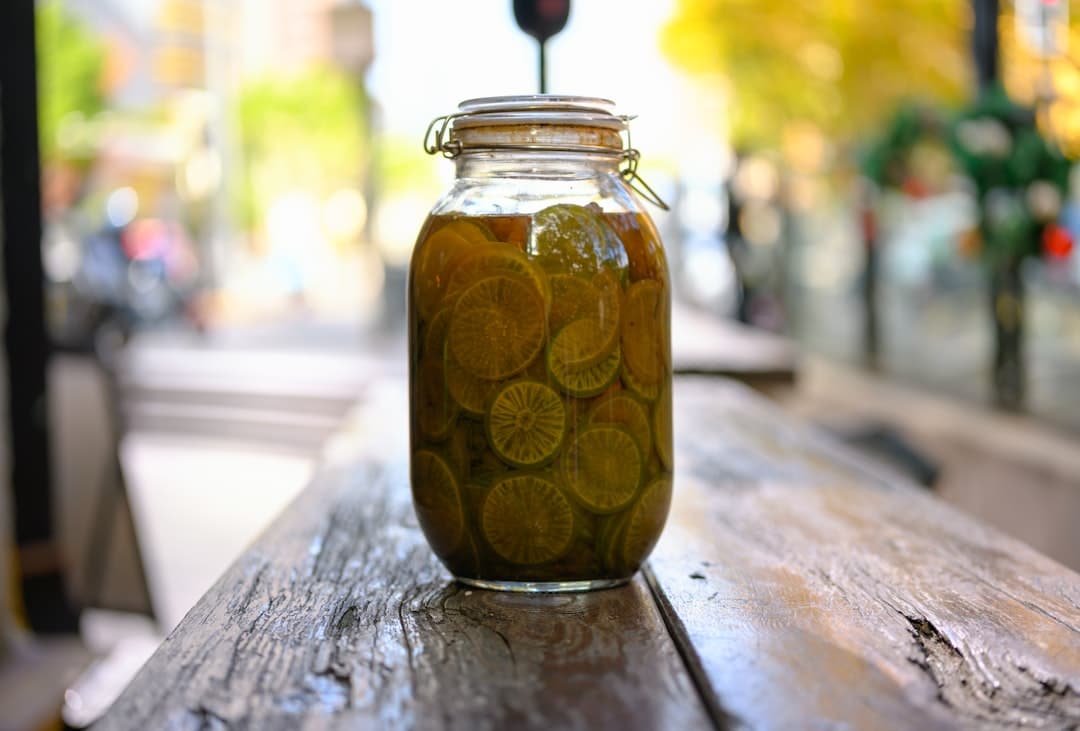
- The Pack: Pack the rinsed vegetables into clean glass jars. Pour the hot brine over the vegetables, ensuring they are fully submerged.
- The Rest: Let the jars cool on the counter for about an hour. Once cool, tighten the lids and move them to the refrigerator.
While you can technically eat them after they cool, they won’t reach their peak flavor for at least 24 hours. By April 2026 standards, we consider these the “ultimate sandwich toppers.”
Traditional Canning for Long-Term Storage
If you want to store your pickles in the pantry, you must use a boiling water bath.
- Sterilization: Ensure your jars are clean and kept hot before filling to prevent glass breakage.
- Headspace: Leave exactly 1/2-inch of space between the top of the brine and the rim of the jar. This “headspace” is vital for creating a vacuum seal.
- Air Bubbles: Run a plastic spatula or wooden chopstick around the inside of the jar to release trapped air bubbles.
- Processing: Submerge the jars in boiling water. Most pint jars require 10–15 minutes of processing.
- Altitude: Water boils at a lower temperature at higher altitudes. If you are above 1,000 feet, you must increase your processing time (usually by 5–10 minutes depending on your specific elevation).
For a deep dive into the rules of shelf-stable preservation, read our guide Safety First: A Guide to Preserving Fermented Foods.
Frequently Asked Questions
Can I make this bread and butter pickle recipe spicy?
Absolutely! While traditional bread and butter pickles are sweet, adding a “zippy” element creates a wonderful sweet-heat contrast. You can add 1/2 teaspoon of dried red pepper flakes to the brine, or for a fresher heat, tuck a few slices of fresh jalapeño or even a habanero into each jar before pouring the brine. The sugar in the recipe helps mellow the burn, making it a “slow build” heat rather than an overwhelming spice.
How long should pickles sit before eating?
Patience is a virtue in pickling. While refrigerator pickles are “edible” after a few hours, the flavor hasn’t fully penetrated the center of the cucumber slice. For the best experience, wait at least 24 to 48 hours. If you are canning your pickles, they actually benefit from a “curing” period of 4 to 5 weeks in the pantry. This allows the spices to fully meld and the vinegary “sharpness” to soften into a mellow, rounded flavor.
How long do homemade pickles last in the fridge?
Refrigerator pickles are not shelf-stable and should be treated like fresh produce. In an airtight container, they will stay delicious and crisp for about one month. After that, they may start to lose their crunch and become overly soft. Always check for signs of spoilage: if the brine becomes extremely murky (beyond the natural cloudiness of the spices), if you see mold, or if they develop a “fizzy” or “off” smell, it’s time to toss them.
Conclusion
Mastering a bread and butter pickle recipe is a rite of passage for any home cook. There is a unique satisfaction in pulling a jar of your own hand-crafted pickles out of the fridge to serve alongside a summer barbecue or a cozy winter grilled cheese.
Remember the golden rules: start with fresh Kirby cucumbers, never skip the ice soak, and use the right salt. Whether you stick to the quick refrigerator method or venture into traditional canning, you are participating in a beautiful tradition of food preservation that dates back generations.
If you avoid common mistakes like using waxed cucumbers or skipping the rinsing step, your pickles will be the star of every charcuterie board. For more guides on how to fill your pantry with “garden-grown goodness,” explore our other Preserving Basics and fermentation tutorials.
Ready to dive deeper into preservation? Visit us for More info about preservation services and start your journey to becoming a master of the jar!