How to Master Dehydrating Food in 30 Days
What Is Dehydrating Food and Why It’s Worth Mastering
Dehydrating food is one of the oldest and most effective ways to preserve ingredients — and it’s having a serious comeback in home kitchens right now.
Here’s the quick answer if you need it fast:
How dehydrating food works:
- Heat removes 80-95% of moisture from food
- Without moisture, bacteria, mold, and yeast cannot grow
- Food is preserved without refrigeration — sometimes for years
- Nutrients stay largely intact (only 3-8% lost on average)
- Weight drops dramatically, making food portable and space-efficient
Our ancestors did this with nothing but sunlight. Today, a simple electric dehydrator or even a home oven can do the job in hours.
The real appeal for home preservers? You stay in control. No mystery additives, no excess sodium, no guessing what’s in your emergency pantry. You pick the ingredients, the seasoning, and the method.
Fresh produce can lose up to 50% of its vitamins and antioxidants within just a few days of refrigeration. Dehydrating locks that nutrition in — before it disappears.
Whether you’re preserving a bumper crop of tomatoes, prepping lightweight meals for a camping trip, or just trying to reduce food waste, this guide will walk you through everything — step by step, over 30 days.

The Science and Benefits of Dehydrating Food
At its core, dehydrating food is a battle against moisture. Bacteria, yeast, and mold are like uninvited houseguests; they need water to survive and multiply. By reducing a food’s moisture content to a specific range — typically between 5% and 20% — we create an environment where these spoilage organisms simply cannot function.
Unlike canning, which uses high heat that can destroy delicate compounds, or freezing, which requires constant electricity, dehydration is a “low and slow” process. We aren’t cooking the food; we are evaporating the water. This subtle distinction is why dehydrated snacks often taste more intense than their fresh counterparts — you’re tasting the essence of the fruit or vegetable without the water diluting the flavor.
Moisture and Nutrient Retention
One of the most impressive statistics in food preservation is the nutrient retention rate. While canning can result in a 60% to 80% loss of nutrients due to high thermal processing, dehydrating food loses an average of only 3% to 8%.
This process also deactivates enzymes that cause browning and softening, effectively hitting the “pause” button on decay. For those of us at Recipes Guard who love the science of the kitchen, it’s fascinating to see how removing 80-95% of moisture can transform a perishable tomato into a shelf-stable sun-dried delight.
According to research on Preserving food at home: Drying | UMN Extension, the synergy of low humidity, low heat, and consistent air circulation is the “holy trinity” of successful drying.

Health Impacts and Nutrition
When we talk about the health impacts of dehydrating food, we have to mention calorie density. Because you’ve removed the water, a handful of dried apricots has significantly more calories and sugar than a handful of fresh ones. It’s easy to overeat these “concentrated” nutrients, so we always recommend keeping portions smaller than their fresh equivalents.
However, the benefits are numerous:
- Antioxidant Activation: Some studies suggest that the dehydration process can actually activate certain chemicals in foods that help prevent cell damage.
- Fiber Boost: Dehydrated fruits and vegetables are excellent sources of dietary fiber, which aids digestion.
- Energy Density: For hikers and athletes, these foods provide a lightweight, high-energy fuel source that is easily absorbed.
A Note on Medication: If you are on specific medications, be mindful of concentrated nutrients. For example, the high levels of Vitamin K in dehydrated kale chips can interfere with certain blood thinners. Always consult your doctor if you’re making a massive shift in your diet toward concentrated dried greens.
Essential Equipment and Preparation Techniques
To master dehydrating food in 30 days, you need the right tools. While you can technically dry food in the sun or a microwave, we recommend more reliable methods for consistent results.
Electric Dehydrators: Horizontal vs. Vertical
If you’re serious about this hobby, an electric dehydrator is a must-have. There are two main designs:
- Horizontal Airflow: These units have a fan and heating element located at the back. This ensures even drying across all trays and prevents flavor mixing (you can dry onions and apples at the same time without the apples tasting like onions!).
- Vertical Airflow: These usually have the fan at the base. They are often more affordable and expandable, but you’ll need to rotate the trays frequently to ensure the bottom ones don’t “cook” while the top ones stay damp.
According to the National Center for Home Food Preservation, a good dehydrator should have an enclosed thermostat ranging from 85°F to 160°F and a sturdy fan. For more on the fundamentals of keeping your kitchen safe, check out our Preserving Basics section.
Oven Drying: The 140°F Limit
Don’t want to buy a new appliance yet? Your home oven can work, but it has limitations. Most modern ovens don’t go low enough in temperature. To dry food without cooking it, you need to stay around 140°F. You may need to prop the door open 2-4 inches and set up a desk fan nearby to keep the air moving. Be warned: oven drying takes 2-3 times longer than a dedicated dehydrator and uses significantly more energy.
Preparing Ingredients for Success
Preparation is where the “mastery” happens. If your slices are uneven, some will be bone-dry while others are still moist, leading to a moldy disaster in storage.
- Uniform Slicing: Aim for 1/4 inch thickness. A mandoline slicer is your best friend here (but please, use the safety guard!).
- Blanching: For vegetables like carrots, corn, and green beans, a quick 2-5 minute steam blanching “sets” the color and relaxes the cell walls, which actually speeds up the drying time.
- Anti-Browning Dips: To keep apples and pears from turning brown, soak them in an acidic solution (like lemon juice or ascorbic acid) for 10 minutes before loading the trays.
For those venturing into fermented ingredients, Safety First: A Guide to Preserving Fermented Foods applies here too — cleanliness is paramount.
Foods to Avoid
Not everything belongs in a dehydrator. We’ve learned through trial and error that some things just don’t work:
- High-Fat Foods: Fat doesn’t evaporate; it goes rancid. Avoid avocados and very fatty meats.
- Dairy: Butter, milk, and soft cheeses are high-risk for bacterial growth.
- Coconut Milk: The high oil content makes it difficult to dry safely for long-term storage.
- Nut Rancidity: While you can “crisp” soaked nuts, their high oil content means they should be stored in the fridge or freezer after drying to prevent them from smelling like old paint.
Step-by-Step Guide to Dehydrating Food Categories
Now we get to the fun part! Over your 30-day journey, you’ll want to experiment with different categories.
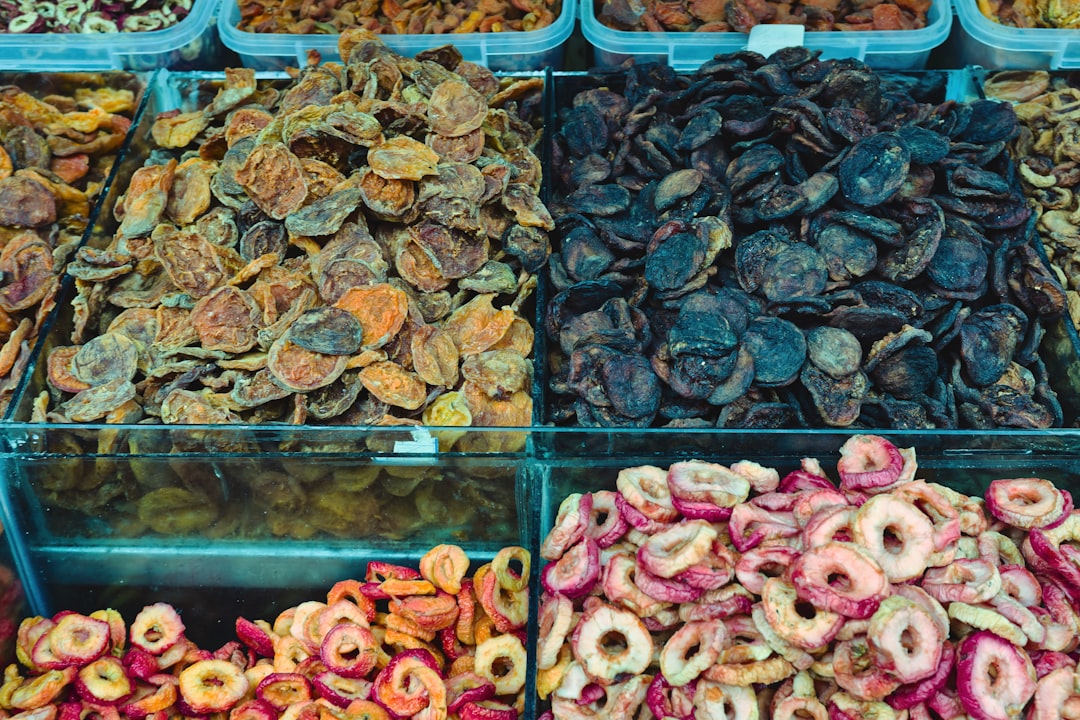
Fruits and Fruit Leathers
Fruits are the “gateway drug” of dehydrating food. They generally dry beautifully at 135°F.
- Apples: Peel, core, and slice. Pretreat with lemon juice. They are done when they feel leathery and pliable, not sticky.
- Berries: Blueberries need to be “checked” (dipped in boiling water until the skin cracks) or they will take days to dry.
- Fruit Leathers: Puree overripe fruit, spread it thin on non-stick sheets, and dry until you can peel it off easily. Pro tip: wrap the finished leather in parchment paper to stop it from sticking to itself.
Vegetables
Vegetables should be dried at a lower temperature, usually 125°F, to preserve their color and vitamins.
- Onions and Peppers: These don’t require blanching. Just slice and dry until brittle. Once dry, you can even blend them into custom powders!
- Leafy Greens: Kale and spinach dry very quickly (2-4 hours). They should be brittle enough to crumble.
Safe Practices for Dehydrating Food: Meats and Jerky
Meat requires extra vigilance. The USDA recommends a “heat first” approach.
- Select Lean Meat: Use 90/10 ground beef or lean flank steak. Trim every bit of visible fat.
- Pre-cook: Steam or roast meat to an internal temperature of 160°F (165°F for poultry) before putting it in the dehydrator. This ensures any pathogens are destroyed.
- Dry at 145°F-155°F: Dry until the meat cracks when bent but doesn’t snap in half.
- Blot the Fat: Every few hours, take a paper towel and blot any beads of oil that rise to the surface of the meat. This prevents rancidity.
If you’re looking to pair your jerky with other treats, learn How to Save Your Salty Snacks to keep your pantry organized.
Common Mistakes When Dehydrating Food at Home
- Overloading Trays: If the air can’t circulate, the food won’t dry. Leave space between every slice.
- Case Hardening: This happens when the temperature is too high. The outside of the food dries into a hard shell, trapping moisture inside. Result? Mold.
- High Humidity: If you live in a very humid climate, your dehydrator has to work twice as hard. Try running it in an air-conditioned room.
- Skipping the Cooling Phase: Always let food cool for 30-60 minutes before checking for dryness. Warm food feels softer than it actually is.
For a different take on vegetable preservation, you might also enjoy our guide on Quick and Easy Pickled Vegetables for Every Meal.
Storage, Rehydration, and Shelf Life
You’ve spent hours drying your food — don’t let it go to waste with poor storage!
The Conditioning Process
Before long-term storage, you must “condition” dried fruits. Put them in a clear glass jar and shake it once a day for a week. If you see any condensation on the glass, the food isn’t dry enough — put it back in the dehydrator! This step equalizes the moisture among all the pieces.
Storage Standards
- Containers: Use glass Mason jars, vacuum-seal bags, or Mylar bags with oxygen absorbers for long-term storage.
- Temperature: Store in a cool, dark place. The “Rule of 20” applies here: food stored at 60°F lasts twice as long as food stored at 80°F.
- Light: Sunlight is the enemy of nutrition. If using glass jars, keep them in a dark pantry.
Rehydration and Usage
Rehydrating is as much an art as drying.
- The 1.5:1 Ratio: For most fruits, use 1.5 cups of water for every 1 cup of dried fruit.
- The 10-Minute Rule: For quick backpacking meals, adding boiling water and waiting 10 minutes is usually enough to soften vegetables and grains.
- Soup Thickening: One of our favorite Recipes Guard hacks is to blend a portion of your dehydrated soup mix into a powder before adding water — it creates a rich, thick broth instantly.
Frequently Asked Questions
How long does dehydrated food typically last?
When stored properly in a cool, dark place (below 60°F), most dehydrated fruits last 6–12 months, and vegetables last about 6 months. Herbs can maintain their potency for 12–24 months. If you use vacuum sealing and oxygen absorbers, you can often extend this shelf life significantly, sometimes up to several years for certain items.
Is dehydrating food better than canning?
“Better” depends on your goal. Dehydrating is superior for nutrient retention (losing only 3-8% vs. up to 80% in canning) and portability. It’s much easier to carry a bag of dried apple rings than a heavy glass jar of applesauce. However, canned food is “ready to eat,” whereas many dehydrated foods require time to rehydrate.
How do you know when food is fully dehydrated?
Use the “Touch and Sight” test after the food has cooled:
- Vegetables: Should be “brittle” or “crisp.” They should snap like a cracker.
- Fruits: Should be “leathery” or “pliable.” If you tear a piece, no beads of moisture should appear at the break.
- Jerky: Should crack but not snap when bent. If in doubt, dry it longer. You can’t really “over-dry” food, but “under-drying” leads to spoilage.
Conclusion
Mastering dehydrating food is a journey that transforms the way you look at a grocery store sale or a backyard harvest. By April 2026, home preservation has become more than just a hobby; it’s a way to ensure food security, reduce our environmental footprint, and enjoy peak-season flavors all year round.
At Recipes Guard, we believe that the best meals start with the best preservation. Whether you are prepping for a rugged backpacking trip or just making healthy kale chips for a movie night, the principles remain the same: low heat, dry air, and plenty of patience.
Ready to fill your pantry with vibrant, nutrient-dense jars of sunshine? Start your preservation journey today and see how easy it is to master the art of the dry!