The Best Ways to Handle Your Apple Harvest Season
Your Apple Harvest Won’t Wait — Here’s How to Make It Last
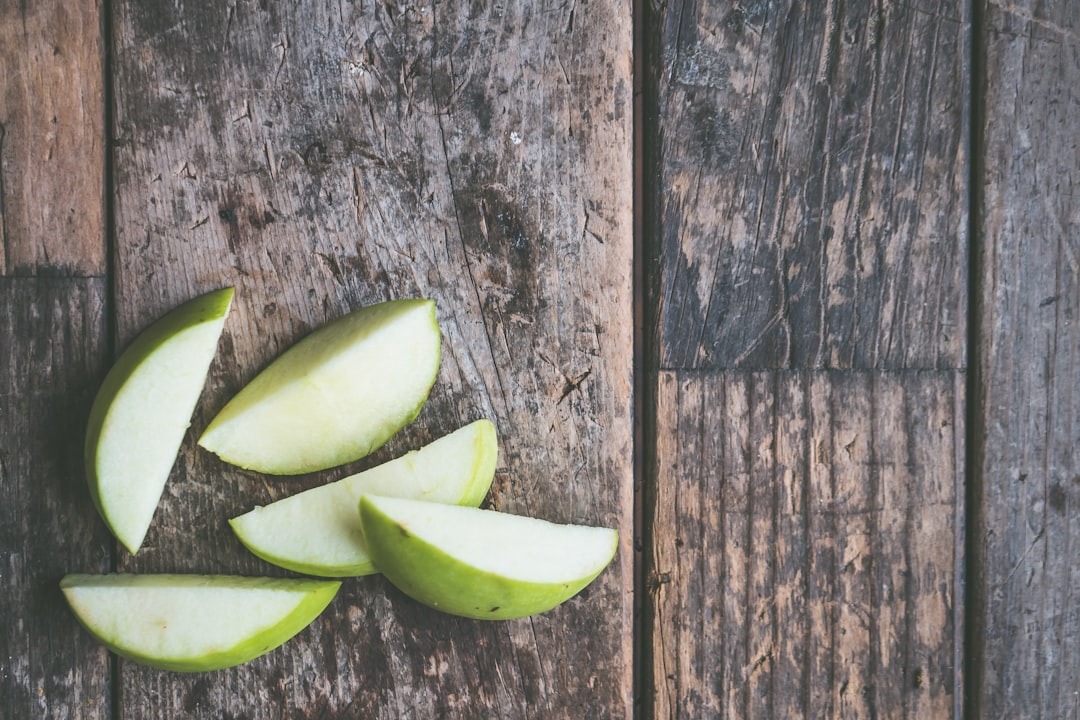
How to preserve apple slices is something every home cook with a bumper crop needs to know before those apples go soft or brown on the counter.
Quick answer — the main ways to preserve apple slices:
- Short-term (up to 24 hours): Soak in salt water (½ tsp kosher salt per cup of water for 5 minutes), rinse, and refrigerate in an airtight container
- Freezer (up to 18 months): Pre-treat to prevent browning, then freeze using a syrup, sugar, or dry pack
- Canning (up to 4 years): Hot pack slices into sterilized jars and process in a boiling water bath for 20 minutes
- Dehydrating (6 months to 1+ year): Slice thin, pre-treat, and dry at 135°F for 6–12 hours until leathery or brittle
Every autumn, kitchens fill up fast. One tree can produce more apples than a family can eat in weeks. And once you slice into one, the clock starts ticking.
That dreaded brown color? It’s not spoilage. It’s enzymatic browning — a chemical reaction that happens the moment a cut apple meets oxygen. It’s harmless, but it makes slices look unappetizing fast. Left untreated, a freshly cut apple can start browning in as little as 15 minutes.
The good news: with the right methods, you can stop browning in its tracks — and keep apple slices tasting great for anywhere from a few hours to several years, depending on your preservation method.
Whether you’re packing a lunchbox or stocking a pantry for winter, this guide covers every reliable technique to help you get the most from your harvest.

The Science of Browning and Short-Term Solutions
To understand how to preserve apple slices, we first have to look at the biology of the fruit. When we cut an apple, we rupture the plant cells, releasing an enzyme called polyphenol oxidase (PPO). When PPO reacts with oxygen in the air and the phenolic compounds naturally found in the fruit, it creates melanin—the same dark pigment found in our skin.
This oxidation process doesn’t just change the color; it can eventually affect the texture and flavor of the fruit. However, we can stall this reaction by creating a physical barrier or by altering the pH level of the fruit’s surface.
In our research and testing, we’ve found that many “old wives’ tales” about keeping apples fresh don’t actually hold up. For example, a simple lemon water dip often only keeps apples fresh for about two hours. If you want to keep your slices looking pristine overnight, you need more effective methods.
According to a How to Keep Sliced Apples Fresh Overnight: A Comprehensive Guide – TheFlexKitchen, there are several household solutions that work wonders:
- Salt Water: Surprisingly, this is the gold standard for short-term preservation.
- Honey Water: Honey has a natural acidity and antimicrobial properties that block oxygen.
- Citric Acid: Highly effective but can make the fruit quite tart.
- Ascorbic Acid (Vitamin C): The professional choice that doesn’t alter flavor much.
If you are new to food storage, we recommend starting with our guide on Preserving Basics to get a handle on the foundational skills.
Preventing Browning for Lunchboxes

When packing a lunch for school or work in April 2026, you want those apples to look just as good at noon as they did at 7:00 AM. The “Salt Water Winner” method is our favorite because it is cheap, effective, and—if rinsed properly—doesn’t leave the apples tasting like the sea.
The secret is the ratio: use 1/2 teaspoon of kosher salt for every 1 cup of room-temperature water. Submerge the slices for exactly five minutes. This time allows the salt to inhibit the PPO enzymes without penetrating deep into the fruit’s flesh. After soaking, rinse them thoroughly under cold running water.
| Method | Duration of Freshness | Flavor Impact |
|---|---|---|
| Salt Water Soak | Up to 12 Hours | None (if rinsed) |
| Honey Water | Up to 12 Hours | Slight sweetness |
| Lemon Juice (Diluted) | 2–3 Hours | Tangy/Sour |
| Plain Water Submersion | 4–6 Hours | Waterlogged texture |
For the best results, always store treated slices in an airtight container or a zip-top bag with as much air pressed out as possible.
Essential Preparation and Tools for Apple Slices
Before we dive into long-term methods like canning or freezing, we must emphasize that your end product is only as good as your preparation. Always start by washing your apples under cold running water. Do not soak them, as they can actually absorb some of the wash water, which dilutes their flavor.
When thinking about how to preserve apple slices, consider the equipment you are using. Always use non-reactive bowls (glass, plastic, or high-quality stainless steel). Avoid galvanized metal, copper, or iron, as these can react with the apple’s natural acids and cause unappetizing gray or black discoloration.
If you are prepping large batches, we suggest using an ascorbic acid solution (1 teaspoon in 2 cups of water) to hold the slices as you work. This keeps the first apple looking as fresh as the last one you peel. For more on the safety of your prep environment, see our Safety First: A Guide to Preserving Fermented Foods guide.
Tools to Simplify Your Harvest
If you have 50 pounds of apples sitting on your kitchen floor, a paring knife is going to feel like a torture device by the third hour. To make the most of your harvest, we recommend a few key tools:
- Apple Peeler-Corer-Slicer: This “old-fashioned” looking crank tool is a game changer. It can peel, core, and slice an apple into a perfect spiral in about 10 seconds.
- Mandolin: If you are dehydrating, a mandolin is essential for achieving uniform 1/8-inch slices. Consistency is key for even drying.
- Vacuum Sealer: For freezer storage, removing all air is the only way to prevent freezer burn over the long term.
As noted in the How to Preserve Apples research, 1 pound of apples equals about 3 cups of diced fruit or 2 3/4 cups of sliced fruit. Having the right tools ensures you don’t lose half your yield to messy hand-cutting.
How to Preserve Apple Slices in the Freezer and Beyond
Freezing is perhaps the easiest way to handle a large harvest. It preserves the fresh flavor of the apple better than canning, though the texture will soften once thawed, making frozen apples best for pies, cobblers, and smoothies.
According to MF1187 Preserve it Fresh, Preserve it Safe Apples, you should not freeze more than 2 pounds of food per cubic foot of freezer capacity per day. This ensures the food freezes quickly enough to prevent large ice crystals from forming, which ruin the texture.
There are three main ways to pack apples for the freezer:
- Syrup Pack: Use a 40% syrup (3 1/4 cups sugar to 5 cups water). This is best for apples you plan to serve in “fresh” desserts like fruit cocktails.
- Sugar Pack: Mix 1/2 cup of sugar per quart of sliced apples. The sugar draws out the juice, creating its own syrup. This is the gold standard for pie filling.
- Dry Pack (IQF): Also known as the “Individual Quick Frozen” method. Lay slices on a tray in a single layer, freeze until solid, then bag them. This allows you to pour out exactly as many slices as you need for a morning bowl of oatmeal.
Always leave at least 1/2 inch to 1 inch of headspace in your containers, as liquids expand when they freeze.
Best Varieties for How to Preserve Apple Slices
Not all apples are created equal. If you use a soft apple like a McIntosh for canning, you’ll end up with applesauce in a jar rather than distinct slices.
For how to preserve apple slices while maintaining that “bite,” look for firm, crisp varieties:
- Golden Delicious: A classic all-arounder that holds its shape well.
- Rome Beauty: Known as a “baking apple,” it excels in the freezer.
- Honeycrisp & Pink Lady: These are excellent for dehydrating because their high sugar content makes for a naturally sweet “chip.”
- Braeburn: A great choice for canning as it balances sweet and tart flavors beautifully.
Long-Term Storage: Canning and Dehydrating Methods
If you want your harvest to last until April 2027 and beyond, you need to look at shelf-stable methods. Canning and dehydrating are the two pillars of long-term apple storage.
Canning Apple Slices: We always recommend the hot pack method over the raw pack. Raw-packed apples contain a lot of air in their tissues; when processed, they shrink, leaving you with jars that are half-full of fruit and half-full of liquid.
- Boil your slices in syrup or water for 5 minutes.
- Pack them into hot, sterilized jars.
- Leave 1/2 inch of headspace.
- Process in a boiling water bath for 20 minutes (for both pints and quarts).
Dehydrating Apple Slices: Dehydrating is a fantastic way to save space. Did you know that 20 pounds of prepared apples dry down to just 6.5 pounds? It is one of the most efficient ways to store a massive harvest.
As mentioned in Dehydrated Apple Slices – Just a Girl and Her Homestead, the key to success is a low, consistent temperature. We recommend 135°F (57°C).
Mastering the Dehydration Process
The “doneness” of your apple slices depends on how you want to use them. For a snack, you might want a leathery texture (pliable but not sticky). For “apple chips,” you want them brittle, so they snap when bent.
The process usually takes between 6 to 12 hours in a dedicated dehydrator. However, the most important step happens after the machine turns off: Conditioning.
- Let the slices cool completely.
- Place them in a glass jar, filling it about 2/3 full.
- Shake the jar daily for one week.
- If you see moisture beads or clumping, they aren’t dry enough—put them back in the dehydrator!
For more detailed tips, check out How to Dehydrate Apple Slices: The Ultimate Guide.
Troubleshooting and Advanced Preservation Techniques
Even experts run into trouble sometimes. One common issue in canning is floating fruit. This happens because apples are less dense than the sugar syrup. To prevent this, ensure you are using the hot pack method and packing the fruit tightly into the jars without crushing it.
If your slices come out mushy, it’s usually a variety issue. Avoid “mealy” apples for canning. If you find yourself with mushy slices anyway, don’t throw them out! Blend them into applesauce or use them in our guide for Mastering the Art of Lacto-Fermented Hot Sauce (apple sweetness is a great balance for heat!).
At Recipes Guard, we hate waste. Don’t toss those peels and cores! You can use them to make apple scrap vinegar. Simply submerge the scraps in water with a bit of sugar and let them ferment. It’s a great way to dip your toes into our Fermented Recipes.
Common Mistakes When Learning How to Preserve Apple Slices
- Overcrowding Trays: When dehydrating, if slices overlap, they won’t dry evenly, which leads to mold in storage.
- Skipping the Pre-treatment: Unless you like brown chips, don’t skip the acid or salt soak.
- Improper Headspace: Too much air in a canning jar can lead to discoloration at the top; too little can cause the jars to unseal.
- Altitude Adjustments: If you live more than 1,000 feet above sea level, you must increase your canning processing time.
If you enjoy the tang of preserved foods, you might also want to try our Quick and Easy Pickled Vegetables for Every Meal for more pantry-stocking inspiration.
Frequently Asked Questions about Apple Preservation
Which apples are best for canning versus dehydrating?
For canning, choose firm, tart-sweet varieties like Braeburn, Gala, or Fuji. They hold their shape through the high heat of the canner. For dehydrating, Honeycrisp and Cosmic Crisp are fantastic because their natural sugars concentrate, making them taste like candy.
How long do preserved apple slices last in 2026?
- Fresh (treated): 24 hours in the fridge.
- Frozen: 12 to 18 months for best quality.
- Canned: Up to 4 years if stored in a cool, dark place (though quality is best in the first 12–18 months).
- Dehydrated: 6 months (chewy) to 1 year (crispy) in airtight containers.
Can I preserve apple slices without using sugar or salt?
Yes! You can freeze apples using the “Dry Pack” method with just an ascorbic acid (Vitamin C) dip to prevent browning. For canning, you can use plain water or apple juice instead of sugar syrup, though the sugar does help the fruit maintain its firm texture and bright color.
Conclusion
Mastering how to preserve apple slices is one of the most rewarding skills for any home gardener or frugal shopper. It transforms a fleeting autumn harvest into a year-round resource for your family. Whether you are filling your freezer with pie-ready slices or lining your shelves with golden jars of fruit, you are taking a major step toward food security and a more sustainable kitchen.
At Recipes Guard, we believe that the art of preservation is about more than just “saving food”—it’s about celebrating the seasons. We hope this guide helps you manage your harvest with confidence. If you’re ready to expand your skills even further, Learn more about preserving basics and start your next kitchen adventure today!