Stop Guessing and Buy the Best Home Fermentation Kit
Why Choosing the Best Home Fermentation Kit Changes Everything
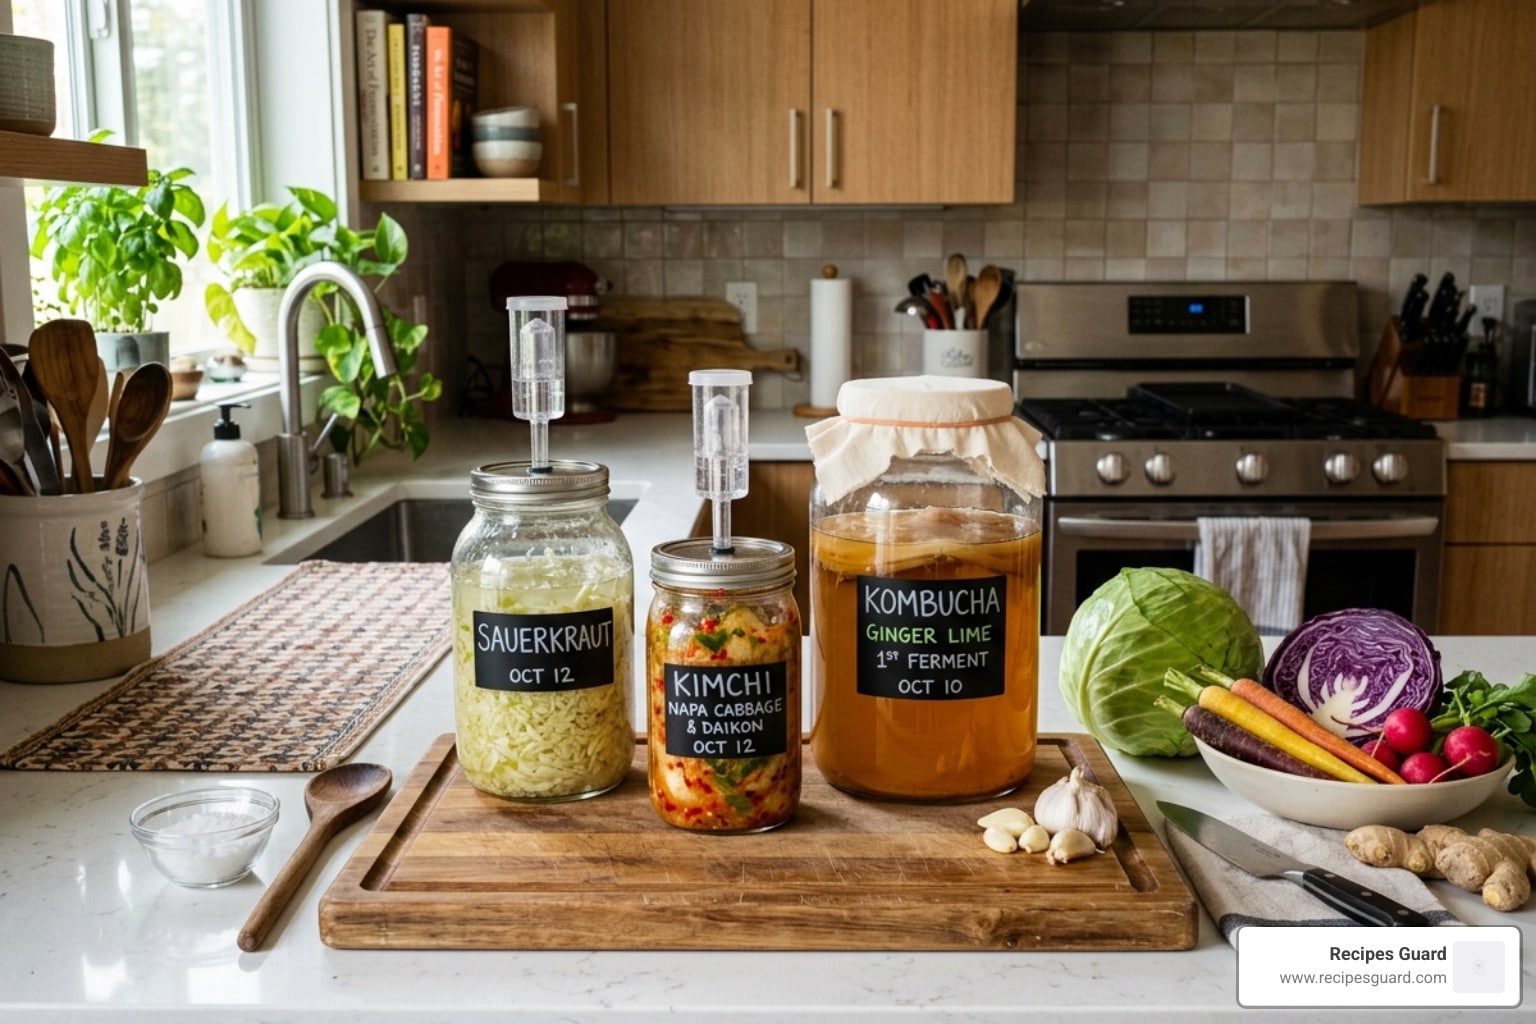
The best home fermentation kit gives you everything you need to make probiotic-rich foods like sauerkraut, kimchi, pickles, and kombucha — right in your own kitchen, with consistent, safe results from your very first batch.
Quick answer — top home fermentation kit picks for 2026:
| Kit Type | Best For | Key Inclusions |
|---|---|---|
| Complete vegetable kit | Beginners: sauerkraut, kimchi, pickles | Airlocks, glass weights, tamper, recipe book |
| Kombucha starter kit | Beverage fermentation | SCOBY culture, brewing vessel, guide |
| Kefir starter kit | Dairy or vegan kefir | Starter grains, strainer, instructions |
| Sourdough kit | Bread baking | Starter culture, proofing tools, recipe guide |
| Single-jar starter kit | First-timers on a budget | One airlock lid, one weight, basic guide |
Fermentation is one of those hobbies that sounds complicated but really isn’t — once you have the right tools.
The tricky part? Figuring out what “the right tools” actually means. Walk into any kitchen shop or browse online, and you’ll find dozens of options. Airlocks, weights, crocks, starter cultures, mason jar lids — it’s a lot to sort through.
And if you skip the right equipment, you’re not just risking a failed batch. You’re risking mold, off-flavors, or ferments that simply aren’t safe to eat.
Getting the setup right from the start makes the whole process easier, safer, and more repeatable.
That’s exactly what a quality fermentation kit is designed to do — remove the guesswork so you can focus on the fun part: making delicious, gut-healthy food.

Key Features of the Best Home Fermentation Kit
When we look for the best home fermentation kit in 2026, we aren’t just looking for a box of plastic lids. We are looking for professional-grade materials that can withstand the acidic, salty environment of a long-term ferment.
The primary goal of any kit is to create an anaerobic (oxygen-free) environment. This is where the “good” bacteria (Lactobacillus) thrive while the “bad” stuff (mold and aerobic yeast) is kept at bay. To achieve this, several key features are non-negotiable.
Material Quality and Longevity
In our experience, material choice is the difference between a kit that lasts a lifetime and one that ends up in the bin after three months.
- 316 Stainless Steel: While many basic kits use 304 stainless steel, the top-tier options now favor 316 medical-grade stainless steel. Why? Because fermentation involves salt and acid, a combination that can eventually corrode lower grades of metal.
- Food-Grade Silicone: This is essential for gaskets and airlocks. It’s BPA-free, heat-resistant, and doesn’t harbor bacteria.
- Soda-Lime or Borosilicate Glass: Jars and weights should be heavy-duty. We prefer clear glass so we can monitor the “bubbles” and color changes during the process.
Airlock Technology: Waterless vs. Water-Based
The airlock is the heart of the kit. It allows Carbon Dioxide (CO2) to escape so your jar doesn’t explode (a real concern!), while preventing oxygen from entering.
- Waterless Airlocks (Silicone Valves): These are the one-way silicone valves. They are low-profile, dishwasher-safe, and incredibly easy for beginners because they don’t require maintenance. You just screw them on and walk away.
- Water-Based Airlocks (S-Type or 3-Piece): These are traditional. You fill them with a bit of water or sanitizer. They provide a very visible “bubble” so you know fermentation is active, but they require a bit more height clearance in your cupboard.
For a deeper dive into why these safety measures matter, check out our Safety First: A Guide to Preserving Fermented Foods.
Finding the Best Home Fermentation Kit for Vegetables
Vegetable fermentation is the most common entry point for home hobbyists. Whether you’re dreaming of crunchy dill pickles or a spicy batch of kimchi, the best home fermentation kit for vegetables usually centers around the ubiquitous Mason jar.
Most high-quality vegetable kits are designed to fit “Wide Mouth” Mason jars (which have a diameter of 3.38 inches or 8.6cm). This size is preferred because it’s easier to pack the vegetables down tightly.
What should be in a vegetable kit?
- A Tamper (Pickle Packer): Usually made from acacia wood, this tool allows you to pound the cabbage or veggies to release their natural juices, creating the brine.
- Airlock Lids: To vent gas automatically.
- Glass Weights: To keep everything submerged.
- Recipe Guide: A must-have for beginners. Some kits include up to 7 step-by-step recipes for classics like sauerkraut and ginger carrots.
If you’re looking to branch out into something with a kick, you might want to try Mastering the Art of Lacto-Fermented Hot Sauce once you have your kit ready.
Why the Best Home Fermentation Kit Includes Glass Weights
We cannot stress this enough: if it’s not under the brine, it’s fine… to grow mold. Keeping your vegetables completely submerged in the salty brine is the golden rule of fermentation. This is why the best home fermentation kit will always include heavy glass weights.
Why Glass?
- Non-Porous: Unlike stone or ceramic, glass won’t absorb odors or bacteria from previous batches.
- Visibility: You can see right through them to ensure no air bubbles are trapped underneath.
- Grip: Look for weights with small “finger grips” or handles. Trying to fish a slippery, flat glass disc out of a jar of brine is a recipe for frustration!
Weights also help prevent “heaving.” As CO2 bubbles form, they can push the entire mass of vegetables upward. A heavy glass weight (or a specialized stainless steel spring) provides the counter-pressure needed to keep the environment anaerobic.
For those just starting out, we recommend trying a simple project first. Don’t Be Afraid of the Funk with This Easy Fermented Garlic Recipe is a great way to test your new weights.
Essential Components for Fermentation Success

While a starter kit gets you through the door, there are a few extra “pro” tools that we believe turn a hobby into a craft. If you want reproducible results every single time, you need to move beyond “handfuls” of salt and “eyeballing” the water. According to scientific research on the safety of fermented foods, maintaining proper salinity and acidity is crucial for preventing the growth of harmful pathogens.
The Power of a Digital Scale
Precision is the secret sauce of the fermentation world. Most sauerkraut recipes call for a 2% salt-to-vegetable ratio by weight. Using a digital scale (like the MyWeigh KD-8000) ensures that whether you have a small head of cabbage or a massive one from the garden, your brine is always perfect.
- Pro Tip: Look for a scale with a “percentage” key or one that doesn’t have an aggressive “auto-off” feature. There’s nothing more annoying than your scale turning off while you’re halfway through adding salt!
Monitoring with pH Strips
How do you know if your ferment is actually safe to eat? The FDA recommends a pH level of 4.6 or lower for acidified foods to ensure they are safe from harmful pathogens. For shelf-stable items like hot sauce, many aim for 3.4 or below. Having a pack of pH strips or a digital pH meter in your toolkit provides ultimate peace of mind.
Salt Quality
Not all salt is created equal. The best home fermentation kit might include a starter pack of salt, but eventually, you’ll need to buy your own. We recommend:
- Himalayan Pink Salt: Contains over 80 trace minerals and is free from the anti-caking agents found in table salt.
- Sea Salt: Ensure it is unrefined and non-iodized. Iodine can inhibit the growth of the beneficial bacteria we want.
For a collection of ideas on what to make next, browse our Fermented Recipes section.
Comparing All-in-One Kits to Individual Tools
Is it better to buy a “Complete Bundle” or to piece together your own kit? Here is how they stack up in 2026.
| Feature | All-in-One Kit | DIY Tool Assembly |
|---|---|---|
| Initial Cost | $45 – $60 (Mid-range) | $70+ (Buying items separately) |
| Ease of Use | High — everything fits perfectly | Variable — lids might not fit jars |
| Learning Curve | Low — includes guides/recipes | High — requires independent research |
| Quality | Consistent across all parts | Can vary by brand |
| Giftability | Excellent — looks professional | Poor — looks like a box of random parts |
The Value of the All-in-One System
For most beginners, the all-in-one kit is the clear winner. Leading manufacturers have spent years perfecting the “fit” of their components. When you buy a kit, you know the glass weight is exactly the right diameter for the wide-mouth jar, and the silicone airlock creates a perfect seal with the screw band.
These kits often include “Storage Caps” as well. Once your ferment is done, you remove the airlock and replace it with a simple airtight lid before moving the jar to the fridge. This transition is seamless with a kit.
When to Go DIY
If you are already an experienced fermenter or you are looking to do very large batches (like 5-gallon crocks of pickles), you might prefer individual tools. High-capacity digital scales, professional-grade mandolines for slicing, and large ceramic crocks are usually sold separately from the “starter” kits.
If you’re still deciding which path to take, our Preserving Basics guide covers the fundamental equipment every kitchen needs.
Safety Tips and Common Mistakes to Avoid
Even with the best home fermentation kit, things can occasionally go sideways. Fermentation is a living process, and microbes don’t always follow the rules! Here is how to stay safe and avoid the most common pitfalls.
1. The “Burping” Trap
If you aren’t using an airlock, you have to “burp” your jars daily to release built-up CO2. We’ve seen lids bulge until they were as hard as a rock! If you forget to burp a jar, it can explode, leaving you with a glass-shards-and-sauerkraut mess on your ceiling.
- Solution: Use a kit with an automatic venting airlock. It’s a “set it and forget it” solution that keeps your kitchen safe.
2. Identifying Kahm Yeast vs. Mold
This is the number one question beginners ask.
- Kahm Yeast: A white, wavy, translucent film on the surface. It’s harmless but can affect the flavor if left too long. It usually happens if the environment isn’t acidic enough or if there’s too much oxygen.
- Mold: Fuzzy, colorful (green, black, pink), and often grows in circular patches. If you see fuzzy mold, toss the whole batch. Do not try to “scrape it off,” as mold spores can penetrate deep into the brine.
3. Temperature Stability
Fermentation loves a consistent temperature. Ideally, you want to keep your jars in a spot that stays between 65°F and 75°F (18°C – 24°C). If it’s too cold, fermentation stalls. If it’s too hot, the vegetables can become mushy, and “bad” bacteria can outpace the “good” ones.
4. Sanitization is Key
You don’t need a sterile laboratory, but you do need a clean kitchen. Wash your jars, weights, and tools in hot, soapy water. Avoid using wooden tools that have cracks where bacteria can hide, unless they are specifically designed for fermentation (like the acacia wood tampers found in top kits).
Frequently Asked Questions About Fermentation Kits
What is included in a complete starter kit?
A standard high-quality kit typically includes a wooden tamper for pounding vegetables, four glass weights to keep food submerged, four silicone airlock lids, and a recipe book. Some dairy-specific kits will also include starter cultures (kefir grains or sourdough flakes) to help you begin your first batch immediately.
Do I need to burp my jars if I use an airlock?
No! That is the primary benefit of the best home fermentation kit. The one-way valve (airlock) allows gas to escape automatically while preventing oxygen from getting in. This eliminates the risk of jar explosions and prevents you from having to monitor the jars every single day.
Are glass weights better than plastic or stone?
Yes. Glass is non-porous, meaning it won’t absorb flavors, odors, or bacteria. It is also transparent, which helps you spot trapped air bubbles. While some older traditional crocks use unglazed stone, these can be difficult to sanitize. Plastic weights should be avoided as they can leach chemicals into the acidic brine over time.
Can I use regular mouth Mason jars?
While you can, we don’t recommend it. Wide-mouth jars (86mm) are much easier to clean, easier to pack with a tamper, and fit standard fermentation weights. Most kits are specifically sized for wide-mouth jars.
Conclusion
Starting your fermentation journey in 2026 has never been easier. By investing in the best home fermentation kit, you’re not just buying kitchen gadgets; you’re buying a foolproof system for better gut health and incredible flavors.
Whether you choose a complete vegetable bundle with 4.9-star ratings or a specialized sourdough starter kit, the key is to prioritize high-quality materials like 316 stainless steel and food-grade silicone. These tools remove the stress of “burping” jars and the fear of mold, leaving you free to experiment with everything from fermented garlic to spicy krauts.
At Recipes Guard, we believe that everyone should have access to the “funk” of fermented foods without the guesswork. Once you have your kit in hand, the possibilities are endless.
Ready to start? Start your journey with our Fermented Recipes and see what you can create today!