A is for Avocado and J is for Jar
Your Avocados Don’t Have to Go Bad in Three Days
The avocado fermentation jar method is a simple lacto-fermentation technique where avocado slices or mashed guacamole are packed into a glass jar with salt and a starter culture, then left at room temperature for 1-3 days to develop beneficial bacteria before being moved to the fridge.
Quick overview of the process:
- Peel and slice (or mash) ripe avocados
- Add sea salt and a starter culture (whey, sauerkraut brine, or kefir)
- Pack into a sterilized glass mason jar
- Keep avocado submerged using a cabbage leaf or fermentation weight
- Ferment at room temperature for 1-3 days
- Transfer to the fridge and consume within 1-2 weeks
Here’s a frustrating truth about avocados: roughly 25% of the world’s avocado supply — about 5 million tons per year — is lost due to how quickly the fruit spoils. For home cooks, that often means a brown, mushy avocado that went bad before you got to it.
Fermentation changes that equation.
When lactic acid bacteria get to work on avocado, they do two important things. They preserve the fruit by lowering its pH, and they transform it — boosting antioxidant activity, enriching healthy fatty acid compounds, and adding a pleasant tang that plain guacamole simply doesn’t have. Scientific research confirms that fermented avocado puree shows significantly higher antioxidant activity than its fresh counterpart.
And yes — fermented guacamole can stay bright green even after sitting out at room temperature for up to three days. That alone is worth paying attention to.
This guide walks you through everything you need to execute the avocado fermentation jar method at home, from choosing the right avocados to troubleshooting common mistakes.

Understanding the Avocado Fermentation Jar Method
When we talk about the avocado fermentation jar method, we are diving into lacto-fermentation. This isn’t just a fancy culinary trend for 2026; it’s a biological process where “good” bacteria—specifically lactic acid bacteria (LAB)—consume the natural sugars in the avocado and produce lactic acid.
This acid creates an environment where harmful spoilage bacteria cannot survive. By using a glass jar, we create an anaerobic (oxygen-free) environment. This is crucial because oxygen is the primary culprit behind that unappealing brown color we all dread.
Beyond just keeping things green, fermentation actually enriches the fruit. A study titled Lactic acid fermentation enriches the profile of biogenic fatty acid derivatives of avocado fruit highlights that this process modifies the bioactive compounds in the avocado, leading to higher levels of free amino acids and health-promoting hydroxy fatty acids. If you are new to these concepts, you might want to explore more info about preserving basics to get a handle on the fundamentals of food science in the kitchen.
The Science of Preventing Browning
Why does fermented guacamole stay green for days while the fresh stuff turns gray in hours? It comes down to pH and enzymes. Avocados contain an enzyme called polyphenol oxidase. When exposed to oxygen, this enzyme triggers a reaction that turns the flesh brown.
Lactic acid bacteria lower the pH of the avocado mixture. This increased acidity inhibits the enzyme’s activity. Furthermore, by packing the avocado tightly into a jar and using a starter culture, we ensure that the beneficial bacteria dominate the environment quickly, effectively locking in that vibrant green hue.
Fermentation vs. Pickling: What is the Difference?
It is easy to confuse these two, especially since both involve jars and a “tangy” result. However, the mechanisms are quite different.
| Feature | Lacto-Fermentation | Vinegar Pickling |
|---|---|---|
| Preservative | Lactic acid (produced by bacteria) | Acetic acid (vinegar) |
| Probiotics | High (live active cultures) | None (unless raw vinegar is used post-heat) |
| Flavor Profile | Complex, funky, and tangy | Sharp, acidic, and “puckery” |
| Shelf Life | Weeks to months (refrigerated) | Weeks (refrigerated) |
While you can certainly make a Pickled Avocado recipe using a vinegar brine, it won’t offer the same probiotic punch as the avocado fermentation jar method. For those who enjoy the crisp bite of vinegar, check out our guide on Quick and Easy Pickled Vegetables for Every Meal.
Essential Equipment and Starter Cultures
To get started, we don’t need a laboratory, but we do need a few specific items to ensure safety and success.
- Glass Mason Jars: Wide-mouth jars are best because they are easier to pack and clean.
- Fermentation Weights: These keep the avocado submerged under the brine or starter liquid.
- Airlock Lids: These allow carbon dioxide to escape while preventing oxygen from entering.
- Sea Salt: Always use non-iodized salt (like Celtic sea salt), as iodine can inhibit fermentation.
- Filtered Water: Chlorine in tap water can kill the very bacteria we are trying to grow.
Choosing Your Starter Culture
While “wild” fermentation (using just salt and the bacteria naturally present on the fruit) is possible, avocados are high in fat and low in sugar, making them a bit more temperamental. We highly recommend using a starter culture to “kickstart” the process.
- Whey: The liquid strained from plain yogurt or kefir with active cultures.
- Sauerkraut Brine: Leftover juice from a jar of raw, unpasteurized sauerkraut.
- Milk Kefir or Water Kefir: Both work well, though milk kefir adds a slight creaminess.
- Apple Cider Vinegar (with the Mother): A great vegan-friendly option that adds a nice zip.
If you’ve already been mastering the art of lacto-fermented hot sauce, you likely have some leftover brine that would make an excellent starter for your avocados!

Step-by-Step Guide to Fermenting Avocados
Ready to try it? Here is our foolproof method for executing the avocado fermentation jar method.
Preparing Your Avocado Fermentation Jar Method Setup
First, let’s talk about the fruit. Should you use ripe or unripe avocados?
- For Slices: Use slightly unripe (firm) avocados. They hold their shape better and won’t turn into mush in the brine.
- For Guacamole/Mash: Ripe avocados are perfect.
The Sterilization Step: Before you begin, ensure your jars and tools are scrupulously clean. You don’t need to boil them for 20 minutes, but a good run through a hot dishwasher or a rinse with distilled white vinegar is a smart move. As we discuss in our Safety First: A Guide to Preserving Fermented Foods, starting clean is half the battle.
If you’re feeling adventurous, you can add aromatics now. Much like our easy fermented garlic recipe, adding a few cloves of smashed garlic to the bottom of the jar can elevate the flavor significantly.
Executing the Avocado Fermentation Jar Method
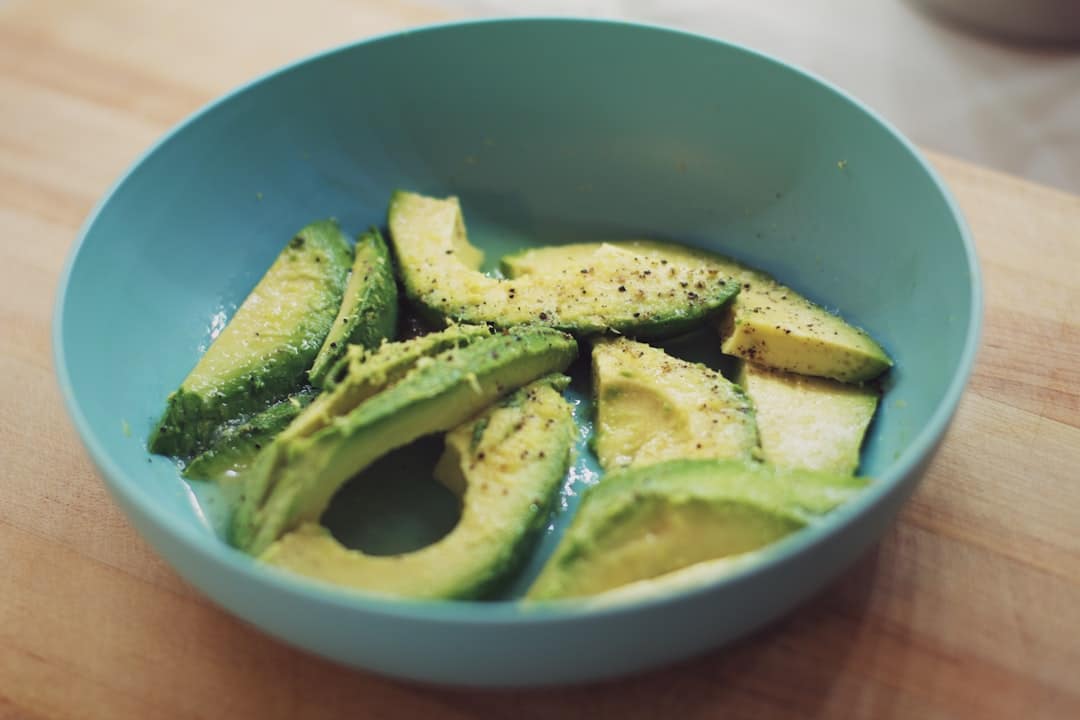
- Prepare the Fruit: Peel and slice your avocados into wedges, or mash them with lime juice and salt if making a “cultured guacamole.”
- Add the Starter: For every two avocados, add about 2 tablespoons of your chosen starter culture (whey, brine, etc.).
- Pack the Jar: Place the avocado in the jar. If you are doing slices, pack them tightly but gently. If you are doing a mash, press it down firmly to remove any air pockets.
- Submerge: This is the most important part.
- For Slices: Cover with a 2% salt brine (about 1 teaspoon of salt per cup of water) plus your starter.
- For Mash: Place a piece of plastic wrap or a clean cabbage leaf directly on the surface of the mash. Press down so the edges are sealed. This prevents oxidation.
- Seal and Wait: Cap the jar with an airlock lid or a loose-fitting lid. Leave it in a dark spot at room temperature.
- Monitor: The process usually takes 24 to 72 hours. You’ll know it’s working when you see tiny bubbles forming (if using a mash, they will form under the plastic wrap or cabbage leaf).
- Refrigerate: Once you see activity and the flavor has reached a tangy “sweet spot,” move the jar to the fridge.
Health Benefits and Nutritional Transformation
Why go through the effort? Because the avocado fermentation jar method turns a “superfood” into a “super-duper-food.”
- Probiotic Power: Fermented avocados are teeming with Lactobacillus plantarum and other beneficial strains. These support gut health, improve digestion, and can even boost the immune system.
- Increased Bioavailability: Fermentation breaks down complex compounds, making the vitamins and minerals in the avocado easier for your body to absorb.
- Healthy Fats: The fermentation process metabolizes oleic and linoleic acids, creating hydroxy fatty acids that are linked to anti-inflammatory benefits.
- Antioxidant Boost: Research shows that fermentation “strongly increased” the antioxidant activity in avocado puree.
For more ways to get these benefits into your kitchen, explore our other fermented recipes.
Troubleshooting Common Fermentation Mistakes
Even experts run into issues. Here is how to handle the most common “funk” factors:
- Oil Rancidity: Avocados have a high fat content. If left at room temperature for too long (over 4 days), the oils can begin to go rancid. Stick to the 1-3 day fermentation window.
- Surface Mold: If you see fuzzy white, green, or black spots on the surface, the avocado wasn’t properly submerged. If it’s just a tiny bit of white “kahm yeast” (which looks like a thin, dusty film), you can usually scrape it off, but if it’s fuzzy, discard the batch.
- Mushy Texture: This usually happens if you use overripe avocados for slices. Next time, choose firmer fruit.
- Off-Flavors: If it smells like “old socks” or ammonia, something went wrong with the bacterial balance. Trust your nose—when in doubt, throw it out.
Pro-Tip for Flavor: We love adding “add-ins” to our jars. Sliced serrano peppers, fresh cilantro, or even pomegranate seeds (an authentic Mesoamerican addition!) can make your fermented avocado the star of the show.
Frequently Asked Questions about Avocado Fermentation
Should I use ripe or unripe avocados for the jar method?
As we mentioned, it depends on your goal! For the best “pickled” texture that you can put on a salad or a taco, go with very unripe avocados. If you want a probiotic dip that replaces your standard guacamole, use ripe fruit. The fermentation process will soften the fruit further, so starting firm is usually the safest bet for beginners.
How long does fermented avocado last in the fridge?
Once the initial room-temperature fermentation is complete, the fridge slows the bacteria down but doesn’t stop them entirely. We recommend consuming your fermented avocado within 7 to 14 days. After two weeks, the flavor can become quite strong and the texture may become overly soft.
Is it safe to ferment high-fat fruits like avocados?
Yes, it is safe, provided you follow basic fermentation safety. The key is the salt and the starter culture. By ensuring a salt concentration of at least 2% and adding a “boost” of good bacteria via a starter, you create an environment that is hostile to pathogens. Always look for visual indicators: bubbles are good, fuzz is bad!
Conclusion
In 2026, we are all looking for ways to eat more sustainably and support our gut health. The avocado fermentation jar method hits both marks. It prevents one of the most perishable fruits from ending up in the compost bin while creating a probiotic-rich topping that tastes incredible on sourdough toast, tacos, or eggs.
Don’t be afraid of the “funk.” Fermentation is an ancient art that is perfectly suited for the modern kitchen. Whether you are a seasoned fermenter or a total novice, giving your avocados a little culture is a decision your taste buds (and your gut) will thank you for.
Explore our full guide to preserving basics and start your fermentation journey today!