How to Ferment Carrot Sticks in 5 Easy-to-Follow Steps
Your Simple Guide to Making Fermented Carrot Sticks at Home
Fermented carrot sticks are crunchy, tangy, probiotic-rich snacks made by submerging raw carrot sticks in a salt brine and letting beneficial bacteria do the work. Here’s the quick version:
- Make a brine – dissolve 1 tablespoon of sea salt in 2 cups of filtered water (a 3.5% salt solution)
- Prep your carrots – peel and cut into sticks that fit your jar
- Pack the jar – add carrots and any spices, then pour brine over them
- Ferment – leave at room temperature (60°F to 75°F) for 5 to 14 days
- Refrigerate – move to the fridge once they taste tangy enough; they’ll keep for up to a month
Unlike vinegar-pickled carrots, fermented carrot sticks are alive. The fermentation process creates beneficial bacteria — probiotics — that are good for your gut. It also makes the carrots more nutritious, releasing beta-carotene that your body can absorb more easily than from raw carrots.
The best part? You only need three things: carrots, salt, and water.
Whether you’ve never fermented anything before or you’re looking to dial in your technique, this guide walks you through every step — from brine ratios to troubleshooting — so your batch comes out crunchy and flavorful every time.

Why Fermented Carrot Sticks Are Better Than Pickled Carrots
When we talk about “pickled” carrots, most people think of the jars found on grocery store shelves. Those are typically preserved in a heated vinegar solution. While tasty, the high heat and acidity of vinegar kill off any beneficial microbes. Fermented carrot sticks, on the other hand, rely on a process called lacto-fermentation.
Lacto-fermentation uses naturally occurring Lactobacillus bacteria found on the skin of the vegetables. When we place carrots in a salt brine, these “good” bacteria convert the natural sugars in the carrot into lactic acid. This acid acts as a natural preservative, preventing spoilage while creating that signature “funk” and tang we love.
The Nutritional Powerhouse
One of the most fascinating things we’ve learned at Recipes Guard is that fermenting carrots actually makes them healthier than eating them raw. Fermentation helps break down the tough cellular walls of the vegetable, which releases more beta-carotene. In fact, a single serving of fermented carrot sticks provides a staggering 11,366 IU of Vitamin A!
| Feature | Lacto-Fermentation | Vinegar Pickling |
|---|---|---|
| Preservative | Lactic acid (produced by bacteria) | Vinegar (acetic acid) |
| Probiotics | High (contains live cultures) | None (usually pasteurized) |
| Nutrients | Enhanced (B-vitamins, Beta-carotene) | Often reduced by heat |
| Flavor | Complex, tangy, “fizzy” | Sharp, acidic, vinegary |
| Difficulty | Easy (requires patience) | Easy (requires boiling) |
Safety is always our priority when working with live cultures. If you’re a beginner, we recommend checking out our Safety First: A Guide to Preserving Fermented Foods to ensure your kitchen environment is ready for success.
Essential Ingredients and the Perfect Brine Ratio
To get started, you don’t need a laboratory. You just need high-quality basics. In April 2026, as we continue to refine our home preservation techniques, we’ve found that the “secret” to a perfect ferment is the salt.
The Salt Matters
Never use iodized table salt. The iodine and anti-caking agents found in standard table salt can inhibit the growth of the good bacteria and make your brine look muddy. Instead, reach for:
- Sea salt
- Himalayan pink salt
- Pickling salt
The 3.5% Brine Rule
For low-water vegetables like carrots, a 3.5% salt solution is the gold standard. This equates to roughly 1 tablespoon of sea salt to 2 cups of filtered water. Why filtered? Because chlorine in city tap water is designed to kill bacteria—exactly the opposite of what we want! If you must use tap water, boil it first and let it cool to room temperature to allow the chlorine to dissipate.

Choosing Your Carrots
We always suggest using organic, field-grown carrots. Why? Because these carrots haven’t been treated with harsh chemicals or heavy chlorine washes (like those bagged baby carrots), meaning they still carry the natural wild yeasts and bacteria needed to kickstart the fermentation.
For more inspiration on what else you can preserve, dive into our Fermented Recipes category.
Step-by-Step Guide to Making Fermented Carrot Sticks
Making fermented carrot sticks is a tactile, rewarding process. It’s a great project for kids, too—they love watching the bubbles form!
Step 1: Preparation
Wash and scrub your carrots. While some people prefer to leave the skin on for extra microbes, we often recommend peeling them if you find the skin tastes bitter. Cut the carrots into sticks. A good rule of thumb for a quart-sized mason jar is to aim for sticks about 4.75 inches long and 3/8 of an inch thick.
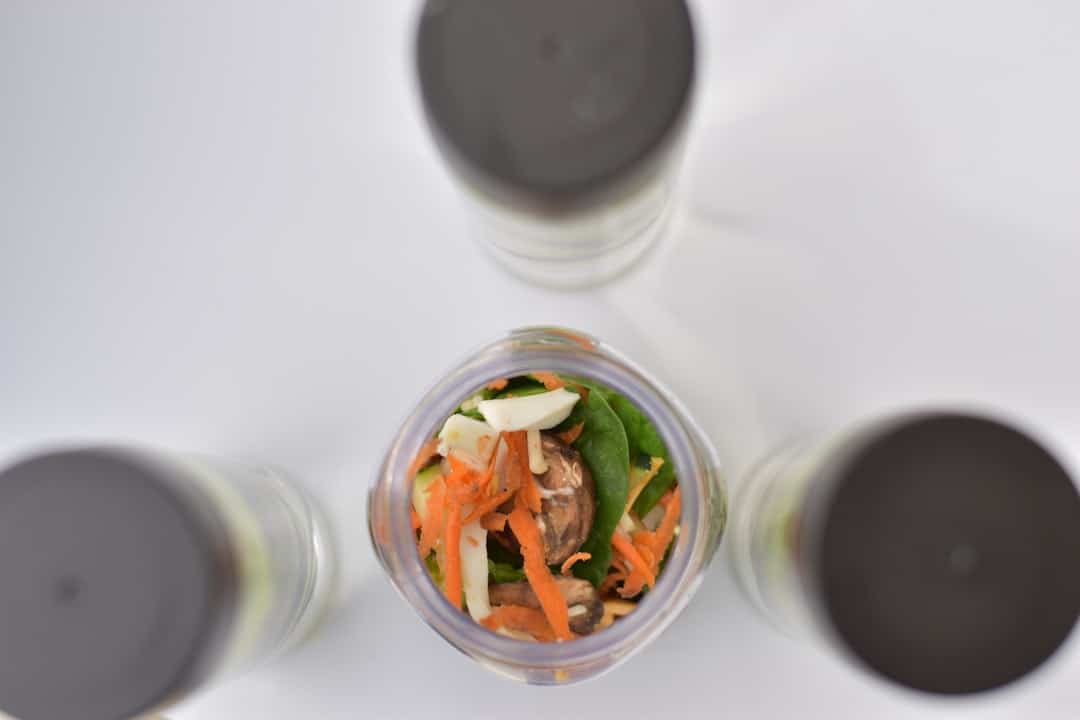
Step 2: Packing
Tilt your clean jar on its side. This makes it much easier to slide the carrot sticks in tightly. You want them “snug” so they don’t float to the top once you add the liquid. Leave about 1 to 2 inches of headspace at the top of the jar. This is where you can tuck in some garlic cloves—check out our guide on Don’t Be Afraid of the Funk with This Easy Fermented Garlic Recipe if you want to master that addition.
Step 3: Brining
Pour your prepared room-temperature brine over the carrots. Ensure every single carrot is fully submerged. This is critical: “Under the brine, all is fine; above the brine, mold is mine.” Use a glass fermentation weight to keep the vegetables pushed down.
Step 4: Fermenting
Cover the jar. If you’re using a standard lid, don’t tighten it all the way; gas needs to escape. Better yet, use a fermentation lid (like a “pickle pipe”) that allows carbon dioxide to vent automatically. Place the jar on a plate (to catch any overflow) in a cool, dark spot.
Step 5: Storage
After 5 to 7 days, start tasting. When they have a pleasant tang and the brine is slightly cloudy, they are ready! Swap the fermentation lid for a regular one and move the jar to the refrigerator.
Flavoring Your Fermented Carrot Sticks with Herbs and Spices
Don’t be afraid to get creative! Carrots are a blank canvas.
- Thai Style: Add lemongrass, ginger, and Thai chilies.
- Dilly Carrots: Fresh dill and a few black peppercorns.
- Anti-inflammatory: Fresh turmeric slices and ginger.
- Spicy: Add a few slices of jalapeño or a teaspoon of red pepper flakes. If you love heat, you might also enjoy Mastering the Art of Lacto-Fermented Hot Sauce.
Ideal Temperature and Time for Fermented Carrot Sticks
The “sweet spot” for fermentation is between 60°F and 75°F (15°C to 24°C).
- Too cold? The bacteria will go dormant, and your carrots will just sit there.
- Too hot? The carrots might go soft or develop off-flavors.
Generally, 5 to 14 days is the window for room-temperature fermentation. You’ll notice the brine becoming cloudy and small bubbles rising to the top—these are signs of active carbon dioxide production, which is exactly what we want to see. For those interested in the deeper science, Scientific research on the benefits of fermented vegetables shows how these specific conditions optimize probiotic counts.
Troubleshooting Common Fermentation Issues
Even experts run into “the funk” sometimes. Here is how to tell the good from the bad.
- Cloudy Brine: This is 100% normal! It’s a sign that the lactic acid bacteria are doing their job.
- Kahm Yeast: This is a thin, white, wavy film that can form on the surface. It’s safe, but it can make the carrots taste a bit “yeasty.” Simply scrape it off.
- Mold: If you see fuzzy growth that is black, green, pink, or orange—toss the batch. This usually happens if the carrots weren’t submerged or if the equipment wasn’t clean.
- Slimy Brine: This sometimes happens with carrots due to their sugar content. Often, if you let it ferment for another week, the slime will disappear as the bacteria finish their work.
- Bubbling/Overflow: This is a sign of a very active ferment! Just wipe the jar and ensure the carrots stay submerged.
For more troubleshooting tips, visit our Preserving Basics section.
Frequently Asked Questions about Fermented Carrots
Can I reuse the brine from my fermented carrot sticks?
Yes, absolutely! The leftover brine is liquid gold. You can reuse it 3 to 5 times as a “starter culture” for your next batch of carrots, which will speed up the fermentation process. It also makes a fantastic, salty addition to soups and stews instead of using standard stock.
Are fermented carrots safe for keto and vegan diets?
They are perfect for both! Fermented carrot sticks are naturally vegan. For those on keto, while carrots have more sugar than leafy greens, the fermentation process actually “eats” much of that sugar. At only 33 kcal and 8g of carbohydrates per serving, they are a great low-calorie snack.
How do I keep my carrots crunchy?
No one likes a mushy carrot. To ensure a satisfying snap:
- Don’t over-ferment: Move them to the fridge as soon as they taste tangy.
- Add Tannins: Drop a bay leaf or a grape leaf into the jar. The tannins help keep the vegetable fibers firm.
- Keep them cold: Once they are in the fridge, the fermentation slows down significantly, preserving that crunch for up to a month.
Conclusion
At Recipes Guard, we believe that bringing fermentation back into the modern kitchen is one of the best ways to support a healthy, probiotic-led lifestyle. Fermented carrot sticks are the perfect “gateway” ferment—they’re simple, safe, and undeniably delicious. Whether you’re packing them in a school lunch or serving them on a charcuterie board, these tangy treats are a testament to the power of traditional food preservation.
Ready to fill your pantry with more probiotic goodness? Explore more Fermented Recipes and start your next batch today! Happy fermenting!