Canning Garden Vegetables Without the Botulism Blues
Why Safe Canning Vegetables and Fruits Matters More Than You Think
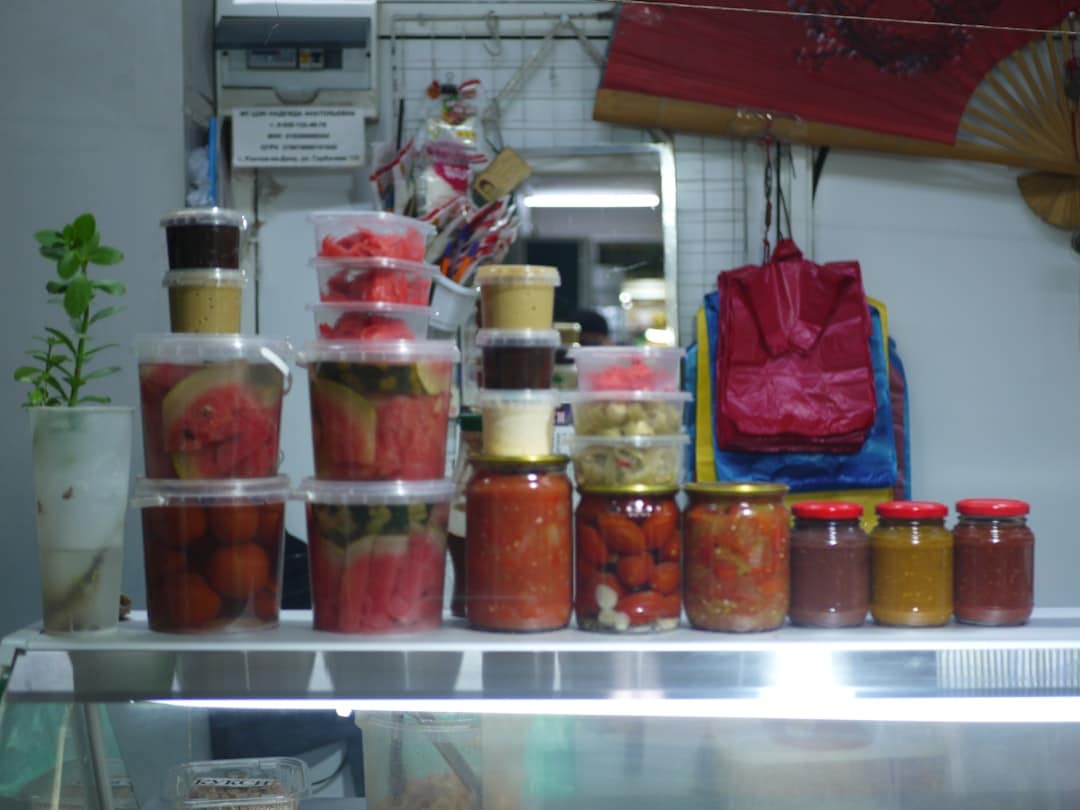
Canning vegetables and fruits is one of the most reliable ways to preserve a summer harvest and enjoy fresh-tasting produce all year long.
Here’s a quick overview of the two safe home canning methods:
| Method | Best For | Temperature Reached | Key Safety Requirement |
|---|---|---|---|
| Water bath canning | High-acid foods (fruits, tomatoes, pickles, jams) | 212°F (100°C) | Food must be naturally high-acid or acidified |
| Pressure canning | Low-acid foods (most vegetables, meats, soups) | 240°F (116°C) | Required to destroy Clostridium botulinum spores |
The core rule is simple:
- High-acid foods (pH 4.6 or below) → water bath canner
- Low-acid foods (pH above 4.6) → pressure canner only
Most home canned foods will last up to 12 months when properly sealed and stored in a cool, dry, dark place.
Every summer, gardens and farmers’ markets overflow with more tomatoes, green beans, and peaches than anyone can eat fresh. Canning turns that abundance into a pantry full of food that lasts through winter — and it costs a fraction of store-bought preserved goods.
But here’s the catch: canning done wrong can be genuinely dangerous. Clostridium botulinum bacteria produce spores that survive boiling water. The only way to destroy them in low-acid foods is to reach 240°F — a temperature only a pressure canner can achieve. Even a small taste of food containing botulinum toxin can be fatal.
That’s why following tested, science-backed methods isn’t optional. It’s the whole game.
This guide walks you through everything — equipment, methods, step-by-step processes, safety checks, and storage — so you can preserve with confidence.

Essential Equipment for Canning Vegetables and Fruits
Before we dive into the “how-to,” we need to make sure your kitchen is staged for success. Think of canning as a science experiment where the reward is delicious food. You wouldn’t perform chemistry with a cracked beaker, and you shouldn’t start canning vegetables and fruits without the right gear.

The Canners
There are two main types of canners you’ll need depending on what’s in your harvest basket:
- Boiling Water Canner: This is essentially a large, deep pot with a lid and a rack at the bottom. It must be deep enough to allow at least one to two inches of briskly boiling water to cover the tops of the jars.
- Pressure Canner: This is a heavy-duty piece of equipment with a lid that locks down to create a steam-tight seal. It features either a dial gauge (which shows the internal pressure on a clock-like face) or a weighted gauge (which “jiggles” or rocks to indicate pressure). A small pressure cooker used for everyday meals is not a pressure canner; a safe canner must be large enough to hold at least four quart jars upright.
The Jars and Closures
Always use standard glass jars specifically designed for home canning, such as Mason or Ball jars. These are tempered to withstand high heat and repeated use.
- Lids: These are the flat metal discs with a sealing compound on the underside. Lids should be new every time to ensure a proper vacuum seal.
- Bands: These are the metal screw rings that hold the lids in place during processing. These can be reused as long as they aren’t rusted or bent.
The “Must-Have” Accessories
To make the process smooth and prevent burns, we recommend a few specialized tools:
- Jar Lifter: These specialized tongs are essential for moving hot jars in and out of boiling water without slipping.
- Canning Funnel: Helps you fill jars cleanly, keeping the rims free of food particles that could interfere with the seal.
- Bubble Remover and Headspace Tool: A non-metallic spatula used to release trapped air bubbles. Often, these have notched ends to measure “headspace” (the empty space between the food and the lid).
- Sterilization Pots: While jars don’t always need to be pre-sterilized if they will be processed for more than 10 minutes, they must always be clean and kept hot before filling to prevent the glass from shattering (thermal shock).
For more detailed specifications on equipment safety, you can refer to the Canning – National Center for Home Food Preservation guidelines.
Water Bath vs. Pressure Canning: Choosing Your Method
The most common mistake beginners make is thinking they can use a water bath for everything. We cannot stress this enough: the acidity of the food dictates the method.
| Feature | Water Bath Canning | Pressure Canning |
|---|---|---|
| Internal Temp | 212°F (Boiling point) | 240°F (Under pressure) |
| Target | Yeast, mold, and some bacteria | Clostridium botulinum spores |
| Food Type | High-acid (pH < 4.6) | Low-acid (pH > 4.6) |
| Examples | Peaches, Berries, Pickles, Jams | Corn, Green Beans, Carrots, Meats |
The science is clear: Clostridium botulinum spores are incredibly heat-resistant. While boiling water kills most microorganisms, those spores laugh at 212°F. Only the 240°F environment of a pressure canner can neutralize them in low-acid environments. This is why Scientific research on canning safety insists on pressure canning for almost all garden vegetables.
Preparing High-Acid Foods for Canning Vegetables and Fruits
High-acid foods include most fruits (like peaches, apples, and berries) and anything that has been heavily acidified, such as pickles or sauerkraut.
A Note on Tomatoes: Tomatoes are the “borderline” food. Depending on the variety and soil, their pH can hover right near 4.6. To safely process them in a water bath, you must add acid. We recommend adding 2 tablespoons of bottled lemon juice or 1/2 teaspoon of citric acid per quart jar. If you’re looking for inspiration, our guide on Quick and Easy Pickled Vegetables for Every Meal offers great ways to use acidification for flavor and safety.
Pressure Processing for Canning Vegetables and Fruits
When you are dealing with the “big three” of the garden—green beans, corn, and carrots—you are in pressure canning territory.
The process involves more than just locking the lid. You must allow the canner to “vent” a steady stream of steam for 10 minutes before adding the weight or closing the petcock. This ensures all the air is driven out, leaving only pure steam inside, which is necessary to reach that critical 240°F. Always check the Canning – National Center for Home Food Preservation for specific timing, as a quart of corn requires much longer than a pint of carrots.
Step-by-Step Guide to Home Preservation
Whether you are water-bathing peaches or pressure-canning potatoes, the preparation steps are remarkably similar.
- Clean and Prep: Wash your jars, lids, and bands in hot, soapy water. Keep the jars warm in a pot of simmering water (around 180°F) until you’re ready to fill them.
- Prepare the Produce: Wash your vegetables and fruits thoroughly. Many vegetables benefit from blanching (a quick dip in boiling water followed by ice water). This cleanses the surface, brightens the color, and wilts the produce so you can pack more into each jar.
- Pack the Jars:
- Raw Pack: Putting raw food directly into jars and covering with boiling water or syrup.
- Hot Pack: Briefly boiling the food in water or syrup before packing. This is often preferred as it removes more air from the food tissues, leading to better color and less “floating” in the jar.
- Manage Headspace: Leave the recommended amount of empty space at the top (usually 1/2 inch for fruits/tomatoes and 1 inch for low-acid vegetables).
- Remove Air Bubbles: Run your bubble remover tool around the inside of the jar. Trapped air can interfere with the vacuum seal and cause discoloration.
- Wipe the Rims: This is crucial! Use a clean, damp paper towel to wipe the rim of the jar. Any speck of food or salt can prevent the lid from sealing.
- Apply Lids and Bands: Center the lid on the jar and screw the band down until it is “fingertip tight.” Don’t use your whole hand to crank it down; air needs to be able to escape during processing.
- Process: Place jars in the canner and follow the specific time and pressure requirements for your recipe and altitude.
- Cooling: Once processing is done, let the canner depressurize naturally (for pressure canning) or let jars sit in the water for 5 minutes (for water bath). Move jars to a towel-lined counter and let them sit undisturbed for 12 to 24 hours. Don’t touch the lids!
For a deeper dive into the “why” behind these steps, see our Safety First: A Guide to Preserving Fermented Foods article.
Critical Safety: Headspace, Altitude, and Acidification
In canning vegetables and fruits, precision is your best friend. There are three “hidden” factors that can ruin a batch if ignored.
The Importance of Headspace
Headspace is the “breathing room” at the top of the jar. If you leave too little, the food may expand and seep out under the lid, preventing a seal. If you leave too much, the processing time might not be long enough to drive out all the air, resulting in a weak seal or discolored food. Generally, stick to 1 inch for vegetables and 1/2 inch for fruits.
Altitude Adjustments
Water boils at a lower temperature at higher altitudes. If you live 1,000 feet or more above sea level, you must increase your processing time (for water bath) or your pressure (for pressure canning). For example, at 2,000 feet, you might need 11 lbs of pressure instead of 10. Failing to adjust means your food won’t reach the temperature necessary to kill bacteria. Always consult Scientific research on vegetable canning tables for your specific elevation.
Tomato Acidification
As mentioned earlier, tomatoes need a boost. Even if you are pressure canning them, many experts still recommend acidification to be safe.
- Per Quart: 2 tablespoons bottled lemon juice or 1/2 teaspoon citric acid.
- Per Pint: 1 tablespoon bottled lemon juice or 1/4 teaspoon citric acid. You can add a pinch of sugar to the jar if you find the extra acid makes the tomatoes too tart.
Post-Canning Care: Sealing, Storage, and Spoilage
Your work isn’t done when the timer goes off. The “rest” period is when the magic vacuum seal happens.
Testing the Seal
After 12–24 hours, press the center of the lid. It should be concave and shouldn’t “pop” back up. Remove the metal bands. If a lid is loose, the jar didn’t seal. You can either refrigerate that jar and eat it immediately or re-process it with a fresh lid within 24 hours.
Storage Guidelines
Store your successful jars in a cool, dry, and dark place. Light and heat are the enemies of nutrition and color.
- Shelf Life: For peak quality, use your home-canned goods within 12 months.
- Remove the Bands: We recommend storing jars without the metal screw bands. If a jar spoils and gases build up, the lid will unseal, alerting you to the danger. If the band is on, it might hide a “false seal.”
Identifying Spoilage
Never taste food you suspect is spoiled. Look for:
- Bulging lids.
- Leaking or seepage.
- Bubbles rising inside the jar (when not being moved).
- Unnatural colors, mold, or “cloudy” liquids in foods that should be clear.
- A foul odor when the jar is opened.
If you find a spoiled jar of low-acid food, handle it with extreme care. Detoxify the jar by boiling it (lid and all) in water for 30 minutes before disposing of it. For more on safe handling, check out More info about fermented recipes.
Frequently Asked Questions about Home Canning
How long do home-canned foods last?
While they can remain safe for years if the seal remains intact, the quality (texture, color, and vitamins) begins to decline after one year. We recommend a “first in, first out” system to ensure you’re always eating the freshest preserves.
Can I use a pressure cooker for canning?
Generally, no. Most “multi-cookers” or small pressure cookers do not have the sensors or the volume to maintain the steady, high pressure required for safe canning. Only use equipment specifically labeled as a “Pressure Canner.”
What are the signs of botulism in canned goods?
The scariest thing about botulism is that you often cannot see, smell, or taste it. This is why following tested recipes and processing times is so vital. However, bulging lids or spurting liquid when opening a jar are major red flags. When in doubt, throw it out!
Conclusion
At Recipes Guard, we believe that preserving your own food is one of the most rewarding skills you can master. Whether you are exploring canning vegetables and fruits or diving into specialized fermentation techniques, the goal is the same: providing your family with high-quality, safe, and delicious food.
Canning doesn’t have to be intimidating. By respecting the science of pH levels, using the right equipment for the right food, and following tested recipes, you can turn your “Botulism Blues” into a pantry full of “Summer Gold.”
Ready to expand your skills beyond the canner? Explore our Category: Preserving Basics for more guides on keeping your harvest fresh, from fermentation to freezing!